最近更新于 2024-05-10 10:06
前言
前面刚刚对 Spring Boot 有了个概念,再来学学 Node.js,顺便当学 JavaScript,为后面入前端做准备。
环境
Node.js 20.12.2
官方 API 文档:https://nodejs.org/docs/latest/api/
CommonJS:https://nodejs.org/api/modules.html
ECMAScript Modules:https://nodejs.org/api/modules.html
npm 的一些命令
查看 npm 配置文件路径
npm config get userconfig查看 Node.js 信息
npm config ls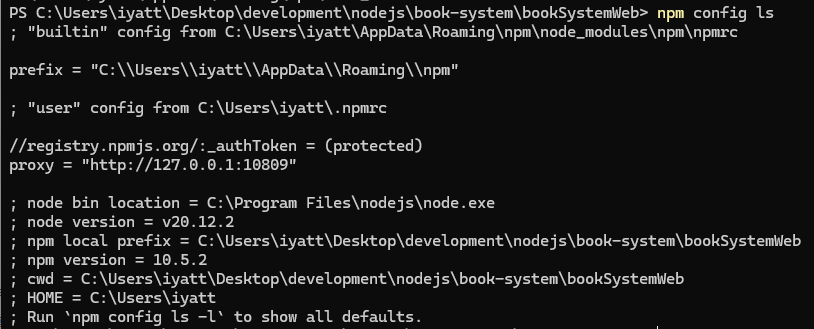
查看已安装的包(使用 -g 就是查全局环境)
npm ls [-g]
设置 npm 源站
npm config set registry=源站

# 默认源站是官方的 http://registry.npmjs.org
# 使用第三方的源站(镜像),可以用这个修改,或改回官方的
设置代理
如果要使用官方的源站,又想要保证下载速度,就使用代理
npm config set proxy=http://server:port

# 如果用的代理有密码
npm config set proxy http://username:password@server:port

# 取消代理
npm config delete proxy
模块导入方式
分为 CommonJS(CJS)和 ECMAScript Modules(ESM)。
CJS 使用 require 导入,使用 modules.export 或 exports 导出。ESM 使用 import 导入,使用 export 导出。
CJS 在运行时加载模块,导入和导出是同步的。ESM 是静态加载,在代码解析的时候进行,导入和导出操作是异步的。
扩展名使用 .js 时默认识别为 CJS,扩展名使用 .mjs 时默认识别为 ESM。Node.js 的早期版本只支持 CJS,后面的开始支持 ESM,新项目可以直接使用 ES。
或者在 package.json 中添加 "type": "module",显式要求使用 ESM
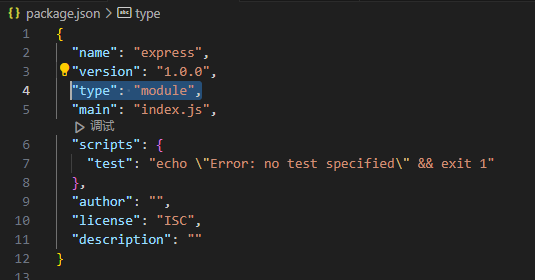
本篇实践以 ESM 进行,下面展示两种方式的对比。
下面的例子会在 8080 端口创建一个 http 服务,展示字符串“Hello World!”,可以通过浏览器访问:http://localhost:8080
CJS
const http = require('node:http');

const hostname = '127.0.0.1';
const port = 8080;

const server = http.createServer((req, res) => {
  res.statusCode = 200;
  res.setHeader('Content-Type', 'text/plain');
  res.end('Hello World!\n');
});

server.listen(port, hostname, () => {
  console.log(`Server running at http://${hostname}:${port}/`);
});
ESM
导入指定模块
import { createServer } from 'node:http';

const hostname = '127.0.0.1';
const port = 8080;

const server = createServer((req, res) => {
  res.statusCode = 200;
  res.setHeader('Content-Type', 'text/plain');
  res.end('Hello World!\n');
});

server.listen(port, hostname, () => {
  console.log(`Server running at http://${hostname}:${port}/`);
});
变量修饰
变量修饰有三种:var、let 和 const
const 和一般编程语言里一样,表示常量,声明时必须初始化,且不可再次赋值,具有块级作用域。如果 const 修饰的是一个对象或数组,虽然不能更换变量索引的对象或数组,但是可以修改对象属性或数组元素。
let 相当于一般编程语言里的局部变量,声明时可以初始化也可以不初始化,后期可以再次赋值,也是块级作用域,比如在大括号内声明的只能在大括号内访问。
var 与另外两种不同,如果在函数外声明,则为全局变量,整个程序中都可以访问。在函数内声明,则仅在函数内可访问。还可以多次声明,后续声明覆盖前面的声明。
同步与异步
Node.js 提供的很多函数都分为同步和异步两个版本,同步版函数通常名字多一个 Sync。
同步可以这样理解:你要泡茶,得先烧水,在烧水得过程中就在旁边等着,直到水烧开了,才倒水泡茶。
异步:同样泡茶,开始烧水,但是你不在旁边等着,跑去看电视了,等水烧好了,再回来倒水泡茶。
异步执行的时候,如果一个操作会花一些实践,那么就不会干等着,会去先执行别的任务。如果是同步就会等着完成一件再做另外一件。从性能来说,异步的性能更高,不会让计算机闲着,但是现实不是总能异步的,如果后续的操作都依赖前面的工作结果,就必须采用同步,等待完成后得到结果才能执行别的任务。应用中根据实际需要来决定使用同步还是异步。
下面用写文件来展示同步和异步
异步
从执行结果可以看到,使用异步写文件,写文件这个操作会花费“较多”时间,但是主线程不会等着它完成,而是先去执行后面的打印“hello world”,在打印这个操作完成以后,写文件的动作才完成。
import { writeFile } from 'node:fs';

writeFile('test.txt', 'hello world', (err) =>
{
    if (err)
    {
        console.error(err);
        return;
    }
    console.log('写入成功');
});

console.log('hello world');
同步
同步写文件,在执行写文件的时候就会阻塞主线程,直到完成以后才能继续往下执行。
import { writeFileSync } from 'node:fs';

try
{
    writeFileSync('test.txt', 'hello world');
    console.log('写入成功');
}
catch (err)
{
    console.error(err);
    process.exit(1);
}

console.log('hello world');
自动重启服务
使用第三方的 nodemon
安装
npm i -g nodemon用 nodemon 运行代码,这样在开发中就不用手动关闭再重新运行,只要保存代码,就会自动重启 Node.js 服务,实时更新修改
文件操作 fs
上面同步与异步举例使用的写文件操作,这里就略过了。
换行符
在不同的操作系统中,默认的换行符是不一样的。
Windows:\r\n(回车符+换行符)
Unix/Linux/macOS:\n(换行符),其中早期的 macOS 采用的换行符是 \r(回车符)
要保证良好的跨平台性,就不要指定某一种,但是自己写每种情况又显得多余,因为 Node.js 提供了换行符。像下面这样导入 EOL就行,这是一个换行符字符串。
import { EOL from 'os';追加文件
专用文件追加函数
import { writeFileSync, appendFileSync, appendFile } from 'fs';
import { EOL } from 'os';

try
{
    writeFileSync('test.txt', 'hello world' + EOL); // 写入文件
    appendFileSync('test.txt', 'hello Node.js' + EOL); // 同步追加文件
}
catch (err)
{
    console.error(err);
    process.exit(1);
}

appendFile('test.txt', 'hello hello' + EOL, err => // 异步追加文件
{
    if (err)
    {
        console.error(err);
        return;
    }
    console.log('写入成功');
});
写文件追加模式
import { writeFileSync } from 'fs';
import { EOL } from 'os';

try
{
    writeFileSync('test.txt', 'hello world' + EOL); // 写入文件
    writeFileSync('test.txt', 'hello Node.js' + EOL, { flag: 'a' }); // 追加文件
    console.log('写入成功');
}
catch
{
    console.error(err);
    process.exit(1);
}
流式写文件
类似一般编程语言里的打开文件操作,打开后会创建一个操作文件的句柄,通过句柄来读写文件,最后关闭句柄。
import { createWriteStream } from 'fs';
import { EOL } from 'os';

const ws = createWriteStream('test.txt');

ws.on('finish', () => // 监听写入完成事件
{
    console.log('写入文件成功');
});

ws.on('error', (err) => // 监听写入错误事件
{
    console.error('写入文件失败:', err);
    return;
});

// 写入文件
ws.write('hello' + EOL);
ws.write('world' + EOL);

// 结束写入
ws.end();
读文件
import { readFileSync, readFile } from 'node:fs';

// 同步
try
{
    const data = readFileSync('test.txt');
    console.log(data.toString());
}
catch(err)
{
    console.error(err);
}

// 异步
readFile('test.txt', (err, data) =>
{
    if (err)
    {
        console.error(err);
        process.exit(1);
    }
    console.log(data.toString());
});
流式读文件
按缓存大小读取
import { createReadStream } from 'node:fs';

var rs = createReadStream('test.txt');

rs.on('data', (data) =>
{
    console.log(data.toString());
});

rs.on('error', (error) =>
{
    console.log(error);
});

rs.on('end', () =>
{
    console.log('(读取完成)');
});
按行读取
import { createReadStream } from 'node:fs';
import { createInterface } from 'node:readline';

var rs = createReadStream('test.txt');
const rl = createInterface(
{
    input: rs,
    crlfDelay: Infinity
});

rl.on('line', (line) => {
    console.log(line);
});

rl.on('error', (error) => {
    console.log(error);
});

rl.on('close', () => {
    console.log('(读取完成)');
});
复制文件
使用一个 69M 的视频文件测试
一次性复制
import { readFileSync, writeFileSync } from 'node:fs';

try
{
    const data = readFileSync('test1.mp4');
    writeFileSync('test2.mp4', data);
}
catch(error)
{
    console.error(error);
}

console.log(process.memoryUsage().rss / 1024 / 1024);
使用内存 106M

流式复制
import { createReadStream, createWriteStream } from 'node:fs';

const rs = createReadStream('test1.mp4');
const ws = createWriteStream('test2.mp4');

rs.on('data', (chunk) => {
   ws.write(chunk);
});
// 也可以使用管道
// rs.pipe(ws);

rs.on('error', (err) => {
    console.errot(err);
});

console.log(process.memoryUsage().rss / 1024 / 1024);
使用内存 36M
在读写的文件较大时,使用流式读写会比较节省内存,默认缓冲区大小为 64KB,一次性最多读入 64KB 到内存,等取出后才能继续读取。

其它文件操作
如重命名文件/移动文件,创建文件夹,删除文件夹,查看文件信息等等,参考文档:https://nodejs.org/api/fs.html
路径 path
在 CJS 中可以直接使用 __dirname 和 __filename 获取文件所在目录和文件自身路径的,但是 ESM 中不可用。
CJS
console.log(__dirname);
console.log(__filename);
ESM
获取目录和路径的实现参考
import { fileURLToPath } from 'url';
import { dirname, resolve } from 'path';

const __filename = fileURLToPath(import.meta.url);
const __dirname = dirname(__filename);
const __dirname = resolve(); // 这种方式获得的是执行时的工作路径,在文件所在目录下执行时结果和上面一样

console.log(__dirname);
console.log(__filename);
路径拼接
在不同的操作系统下路径连接符号不同,在 Windows 下是反斜杠,在 Linux 下是斜杠。通过 Node.js 的路径拼接函数就能根据所在平台进行处理,保证跨平台性。
获取操作系统路径分割符
import { sep } from 'node:path';

console.log(sep);
拼接路径
import { resolve } from 'node:path';

const path1 = resolve('D:', 'hello', 'world', 'test.txt');
console.log(path1);

const path2 = resolve('hello', 'world', 'test.txt');
console.log(path2);
路径解析
import { parse, resolve } from 'node:path';

const path = resolve('index.mjs');
const parseObject = parse(path);
console.log(parseObject);
返回结果是一个对象,包含了根目录,目录,文件名,扩展名,纯文件名

其它函数
文档:https://nodejs.org/api/path.html
Web 服务 http
简单的 web 服务器
import { createServer } from 'node:http';

const server = createServer((req, res) =>
{
    res.setHeader('Content-Type', 'text/html;charset=UTF-8');
    res.end('你好,世界!');
})

const port = 80;
server.listen(port, () =>
{
    console.log(`服务器运行在 http://localhost:${port}/`);
});
获取请求
import { createServer } from 'node:http';
import { parse } from 'node:url';

const server = createServer((req, res) =>
{
    console.log('-'.repeat(100));
    console.log('请求 URL:' + req.url);
    console.log('请求方法:' + req.method);
    console.log('http 版本:' + req.httpVersion);
    console.log('请求头:' + JSON.stringify(req.headers));
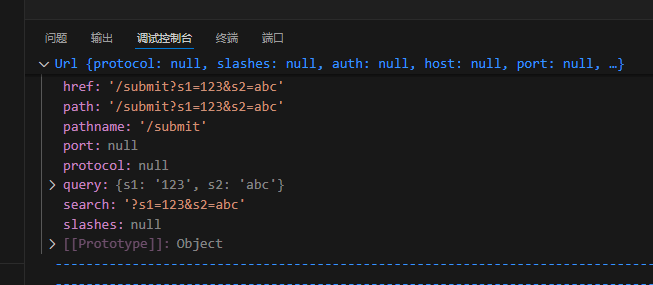
    console.log(parse(req.url, true));
    console.log('-'.repeat(100));

    // 回复客户端
    res.setHeader('Content-Type', 'text/html;charset=UTF-8');
    res.end('你好,世界!');
});

const port = 80;
server.listen(port, () =>
{
    console.log(`服务器运行在 http://localhost:${port}/`);
});访问:http://localhost/submit?s1=123&s2=abc

服务器端获取
另外一种解析方式
import { createServer } from 'node:http';

const server = createServer((req, res) =>
{
    console.log('-'.repeat(100));
    console.log('请求 URL:' + req.url);
    console.log('请求方法:' + req.method);
    console.log('http 版本:' + req.httpVersion);
    console.log('请求头:' + JSON.stringify(req.headers));
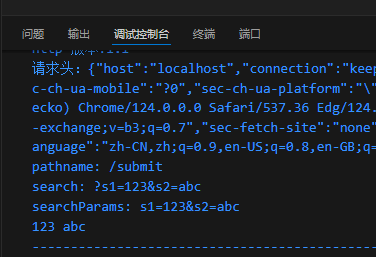
    let url = new URL(req.url, `http://${req.headers.host}`);
    console.log('pathname: ' + url.pathname);
    console.log('search: ' + url.search);
    console.log('searchParams: ' + url.searchParams);
    console.log(url.searchParams.get('s1') + ' ' + url.searchParams.get('s2'));
    console.log('-'.repeat(100));

    // 回复客户端
    res.setHeader('Content-Type', 'text/html;charset=UTF-8');
    res.end('你好,世界!');
})

const port = 80;
server.listen(port, () =>
{
    console.log(`服务器运行在 http://localhost:${port}/`);
});
应用
请求
import { createServer } from 'node:http';

const server = createServer((req, res) =>
{
    let { method } = req;
    let { pathname } = new URL(req.url, `http://${req.headers.host}`);

    res.setHeader('Content-Type', 'text/html; charset=utf-8');
    console.log(method, pathname);
    if (method === 'GET' && pathname === '/login')
    {
        res.end('登录页面');
    }
    else if (method === 'GET' && pathname === '/register')
    {
        res.end('注册页面');
    }
    else
    {
        res.statusCode = 404;
        res.end('Not Found');
    }
});

const port = 80;
server.listen(port, () =>
{
    console.log(`服务器运行在 http://localhost:${port}/`);
});


响应
加载 html 文件作为响应内容
index.mjs
import { createServer } from 'node:http';
import { readFileSync } from 'node:fs';

const server = createServer((req, res) =>
{
    let data = readFileSync('index.html');
    res.setHeader('Content-Type', 'text/html; charset=utf-8');
    res.end(data);
});

const port = 80;
server.listen(port, () =>
{
    console.log(`服务器运行在 http://localhost:${port}/`);
});
index.html
<!DOCTYPE html>
<html lang="zh">
    <head>
        <meta charset="UTF-8">
        <title>表格</title>
        <style>
            td{
                padding: 20px 40px;
            }
            table tr:nth-child(odd){
                background-color: #f11212;
            }
            table tr:nth-child(even){
                background-color: #5b0af1;
            }
            table, td{
                border-collapse: collapse;
            }
        </style>
    </head>
    <body>
        <table border="1">
            <tr><td>1</td><td>2</td><td>3</td></tr>
            <tr><td>4</td><td>5</td><td>6</td></tr>
            <tr><td>7</td><td>8</td><td>9</td></tr>
            <tr><td>10</td><td>11</td><td>12</td></tr>
        </table>
        <script>
            let tds = document.querySelectorAll('td');
            tds.forEach(item => {
                item.onclick = function(){
                    item.style.backgroundColor = '#000000';
                }
            })
        </script>
    </body>
</html>
点击单元格变色

html、css、js 拆分
index.html
<!DOCTYPE html>
<html lang="zh">
    <head>
        <meta charset="UTF-8">
        <title>表格</title>
        <link rel="stylesheet" href="index.css">
    </head>
    <body>
        <table border="1">
            <tr><td>1</td><td>2</td><td>3</td></tr>
            <tr><td>4</td><td>5</td><td>6</td></tr>
            <tr><td>7</td><td>8</td><td>9</td></tr>
            <tr><td>10</td><td>11</td><td>12</td></tr>
        </table>
        <script src="index.js"></script>
    </body>
</html>
index.css
td{
    padding: 20px 40px;
}
table tr:nth-child(odd){
    background-color: #f11212;
}
table tr:nth-child(even){
    background-color: #5b0af1;
}
table, td{
    border-collapse: collapse;
}
index.js
let tds = document.querySelectorAll('td');
tds.forEach(item => {
    item.onclick = function(){
        item.style.backgroundColor = '#000000';
    }
})
main.mjs
import { createServer } from 'node:http';
import { readFileSync } from 'node:fs';

const server = createServer((req, res) =>
{
    var { pathname } = new URL(req.url, `http://${req.headers.host}`);
    if (pathname === '/'){
        res.setHeader('Content-Type', 'text/html; charset=utf-8');
        let html = readFileSync('index.html', 'utf-8');
        res.end(html);
    }
    else if (pathname.endsWith('.css')){
        res.setHeader('Content-Type', 'text/css; charset=utf-8');
        let css = readFileSync(pathname.slice(1), 'utf-8');
        res.end(css);
    }
    else if (pathname.endsWith('.js')){
        res.setHeader('Content-Type', 'application/javascript; charset=utf-8');
        let js = readFileSync(pathname.slice(1), 'utf-8');
        res.end(js);
    }
    else{
        res.statusCode = 404;
        res.end('404 Not Found');
    }
});

const port = 80;
server.listen(port, () =>
{
    console.log(`服务器运行在 http://localhost:${port}/`);
});
部署静态资源站
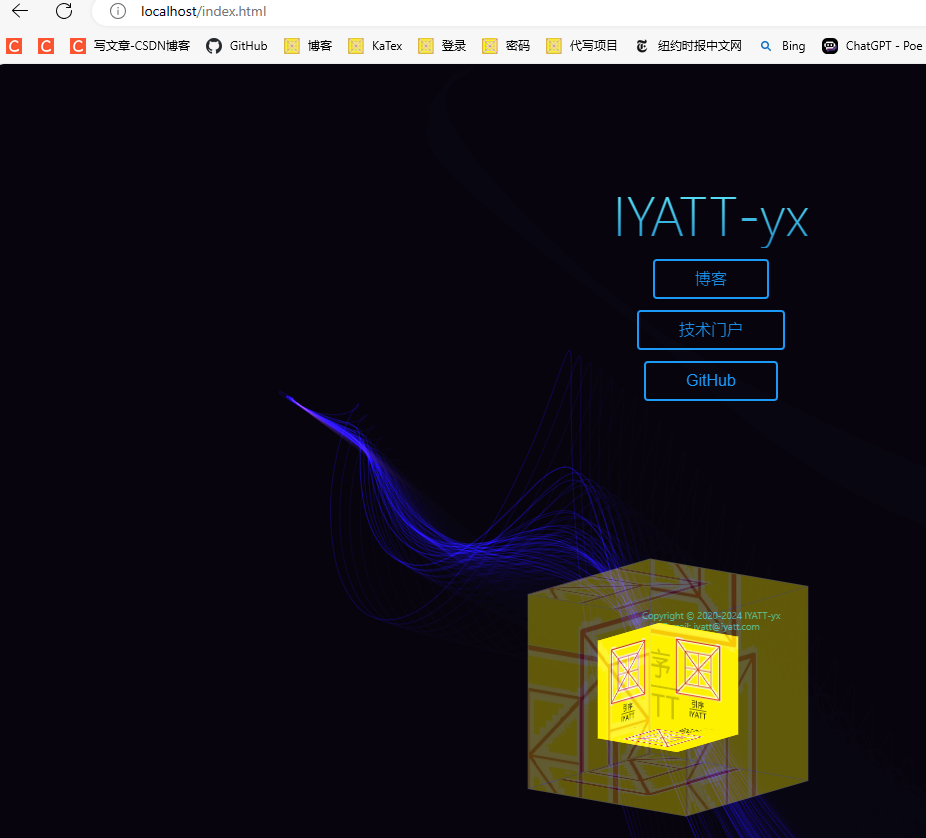
用的我主页的源码,主页地址:https://iyatt.com
文件结构如图
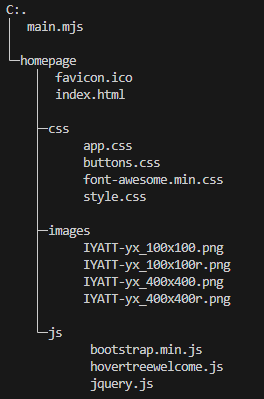
下面是 Node.js 代码
import { createServer } from 'node:http';
import { readFile } from 'node:fs';
import { extname, resolve } from 'node:path';

const root = resolve('homepage'); // 网站根目录
const mimeTypes = { // 支持的文件类型和对应的MIME类型(开发中可以使用第三方模块)
    '.html': 'text/html; charset=utf-8',
    '.css': 'text/css',
    '.js': 'application/javascript',
    '.png': 'image/png',
    '.jpg': 'image/jpeg',
    '.gif': 'image/gif',
    '.ico': 'image/x-icon',
};

const server = createServer((req, res) =>
{
    const { pathname } = new URL(req.url, `http://${req.headers.host}`);

    if (req.method !== 'GET') { // 只处理 GET 请求
        res.statusCode = 405;
        res.end('<h1>405 Method Not Allowed</h1>');
        return;
    }

    if (pathname === '/') { // 访问根目录跳转 index.html
        res.statusCode = 301;
        res.setHeader('Location', '/index.html');
        res.end();
    }
    else {
        const ext = extname(pathname);
        readFile(resolve(root, pathname.slice(1)), (err, data) => {
            if (err) {
                switch (err.code) {
                    case 'ENOENT': { // 文件不存在
                        res.statusCode = 404;
                        res.end('<h1>404 Not Found</h1>');
                        break;
                    }
                    case 'EPERM': { // 权限不足
                        res.statusCode = 403;
                        res.end('<h1>403 Forbidden</h1>');
                        break;
                    }
                    default: { // 其他错误
                        res.statusCode = 500;
                        res.end('<h1>500 Internal Server Error</h1>');
                        break;
                    }
                }
            }
            else {
                if (mimeTypes[ext]) { // 设定已知的 Content-Type
                    res.setHeader('Content-Type', mimeTypes[ext]);
                }
                else { // 未知的产生下载行为
                    res.setHeader('Content-Type', 'application/octet-stream');
                }
                res.end(data);
            }
        });
    }
});

const port = 80;
server.listen(port, () =>
{
    console.log(`服务器运行在 http://localhost:${port}/`);
});
正常访问
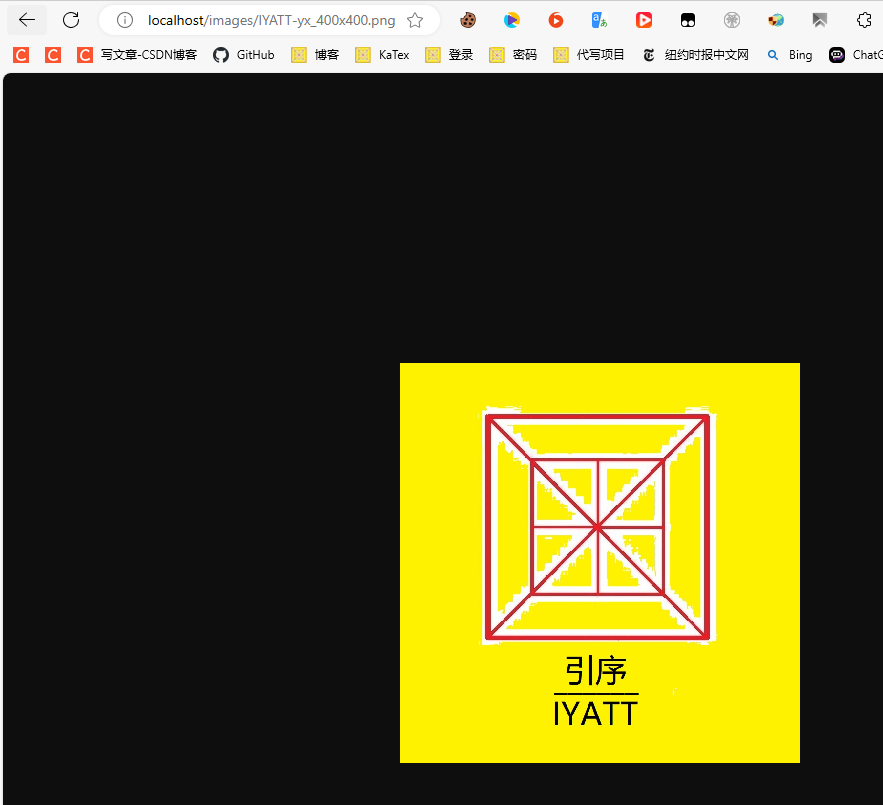
访问资源中的一张图片
找不到文件

没有权限访问文件

下载行为

模块
基于 ESM 的模块导出
导出
自定义模块实现 1
针对单个函数、变量导出,在要导出的函数和变量前加上 export
modules.mjs
export function testFunction1() {
    console.log('测试函数1');
}

export function testFunction2() {
    console.log('测试函数2');
}

export const testConstant = '这是一个常量';
自定义模块实现 2
集中导出,使用 export {} 把要导出的函数、变量放进去
modules.mjs
function testFunction1() {
    console.log('测试函数1');
}

function testFunction2() {
    console.log('测试函数2');
}

const testConstant = '这是一个常量';

export { testFunction1, testFunction2, testConstant }
使用模块
index.mjs
export function testFunction1() {
    console.log('测试函数1');
}

export function testFunction2() {
    console.log('测试函数2');
}

export const testConstant = '这是一个常量';
别名
给要导出的内容设置别名,使用集中导出
modules.mjs
function testFunction1() {
    console.log('测试函数1');
}

function testFunction2() {
    console.log('测试函数2');
}

const testConstant = '这是一个常量';

export { testFunction1 as test1, testFunction2 as test2, testConstant as test }
index.mjs
import { test1, test2, test } from "./modules.mjs";

console.log(test);
test1();
test2();
默认导出
前面的普通导出,在导入使用的时候需要添加一个括号,而默认导出可以不用添加括号。只是在一个模块中只允许一个默认导出,使用方法在普通导出的基础上把 export 换成 export default 就行。如果是设置一个变量为默认导出不能直接在 const/var/let 前写,要额外写导出。比如
const testConstant = '这是一个常量';
export default testConstant;
下面将一个函数默认导出
modules.mjs
export function testFunction1() {
    console.log('测试函数1');
}

export default function testFunction2() {
    console.log('测试函数2');
}
使用
如果一次性导入多个,默认导出的必须写在前面
index.mjs
import testFunction2, { testFunction1 } from "./modules.mjs";

testFunction1();
testFunction2();
包管理工具
Node.js 的官方包管理工具是 npm,也有一些第三方的包管理工具,比如 yarn。
关于 npm 的官方说明:https://nodejs.org/en/learn/getting-started/an-introduction-to-the-npm-package-manager
包安装或依赖安装
安装包使用命令
npm install
# 或
npm i安装指定包可以在命令后跟上包名,搜索包可前往:https://www.npmjs.com/
如果要全局安装就加上参数 -g,一般是命令工具采用全局安装的方式,这样不管在什么路径下都能使用,可以参考要安装的东西的文档决定什么方式安装。使用命令查看全局安装路径
npm root -g
当然命令工具也可以采用非全局安装方式,运行的时候命令前面加上 npx 就行。
如果不使用 -g 参数,默认安装是在当前工作路径下创建一个文件夹 node_modules,并在里面放置安装的东西。另外在工作路径下会产生一个 package-lock.json 文件,里面会记录安装的包的名字、版本、地址、校验信息。在发布自己开发的软件的时候通常不打包 node_modules 文件夹,可以极大地缩小打包体积,在用户使用这个软件的时候可以通过上面的安装命令来自动完成依赖安装,安装的时候不需要指定包名,会读取 package-lock.json 文件获取开发者使用的依赖。
站在软件开发者的角度,对于使用的依赖又分普通依赖和开发依赖,默认安装是标注为普通依赖,即使用 -S 参数,使用 -D 参数安装的则为开发依赖。开发者编写一个软件安装的普通依赖,发布出去,使用 npm i 自动安装依赖会同样安装。而开发依赖一般只是用于开发者测试使用,用户运行开发者编写的软件并不依赖,可以不需要安装,开发者使用 -D 安装这些依赖,则发布出去,用户安装依赖时就不会安装这些依赖。(下图是文档原文)
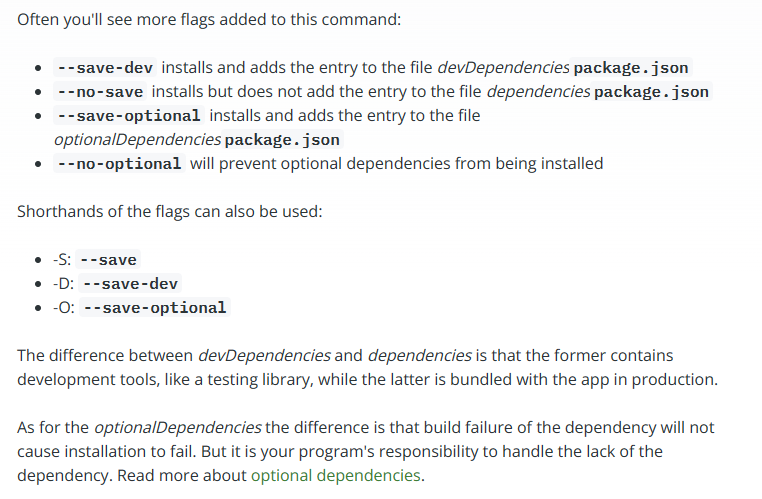
简单来说,如果开发者编写一个软件用到的某些依赖的功能是要集成到编写的软件中,这种依赖开发者就要安装为普通依赖,也可以叫做生产依赖。同时另外存在一些依赖,它们不是软件功能的组成,但是是开发者进行开发需要使用的工具或者测试框架,只是开发者需要,软件运行本身不用,开发者就要把这些依赖作为开发依赖安装。
创建一个项目
创建一个文件夹,终端工作路径切换到文件夹下,执行
npm init默认项目名会使用文件夹的名称,但是项目名称不能用中文,如果文件夹含有中文,就自行设置英文名称,也可以直接设置其它名称
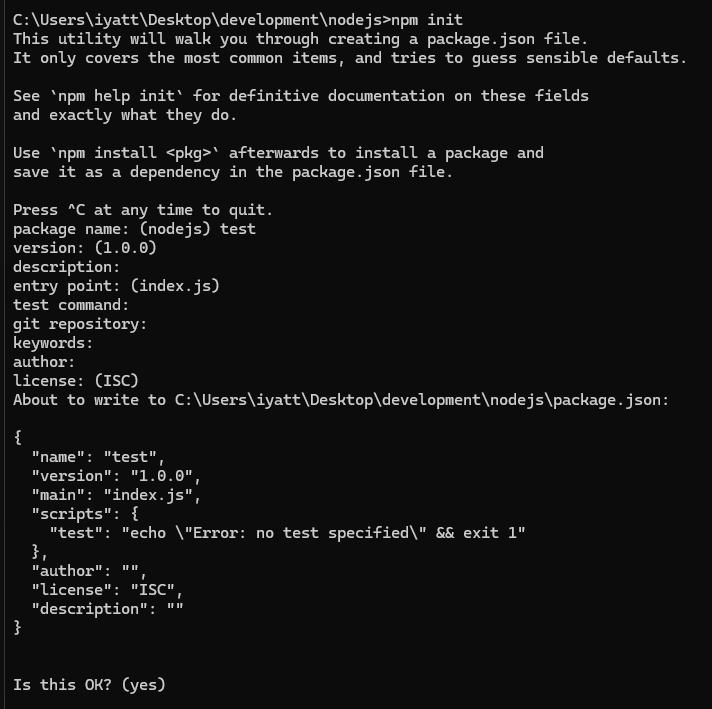
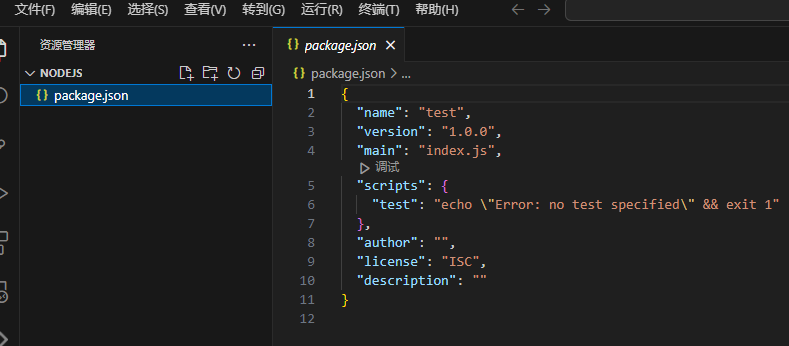
上面的命令就是引导创建一个 package.json 文件
配置命令别名
我写了一个源文件 index.mjs
console.log('Hello, world!');修改 package.json
中 scripts 部分,添加了两个别名 server 和 start 和别名对应执行的命令
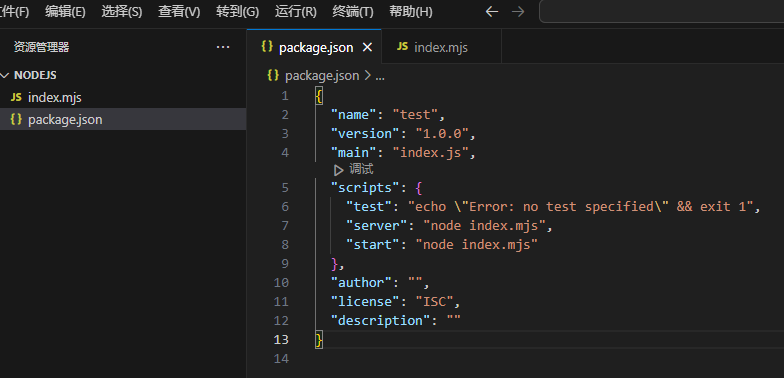
就可以使用 npm run 别名 的方式执行,其中 start 这个别名特殊,可以直接通过 npm start 执行
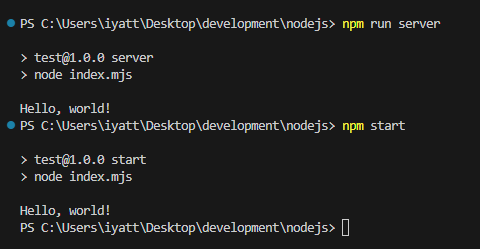
在项目极其复杂,运行时添加参数较多的情况下,通过别名可以更方便的运行
发布包
在 npm 源站注册一个账号:https://www.npmjs.com/
然后创建一个示例演示发布
创建一个包名为 iyatt-package
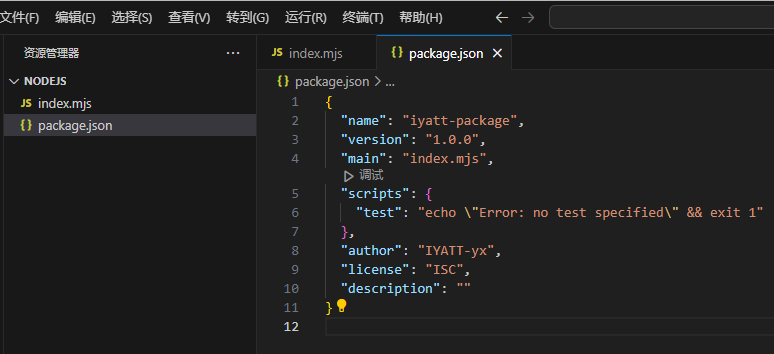
编写源码
index.mjs
export function add(num1, num2) {
    return num1 + num2;
}
如果修改过 npm 源站的,在进行发布操作的时候要换回官方的源站才行,镜像站不支持发布包。
npm 登录注册的账号
npm login发布
npm publish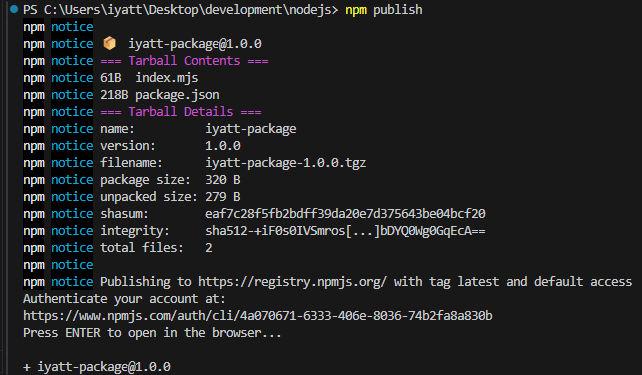
在 npm 源站上就能搜到了
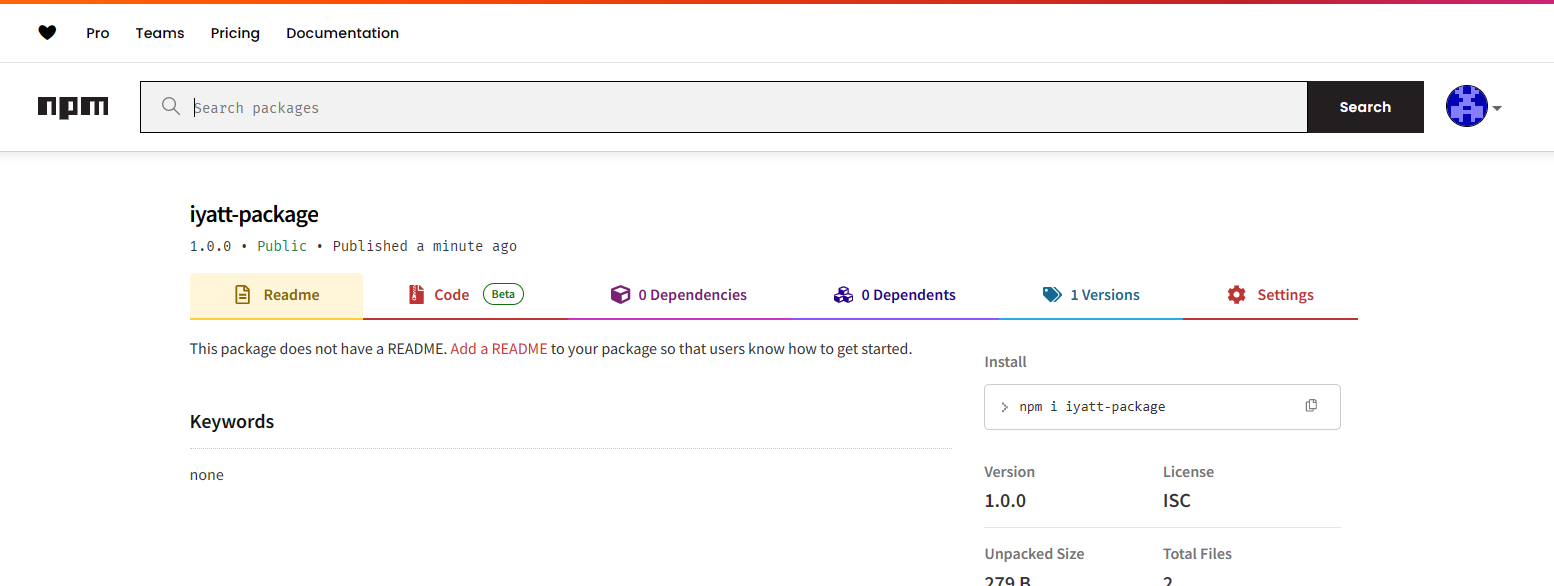
可以执行命令从源站下载安装这个包

写一段代码测试包调用
import { add } from 'iyatt-package';

console.log(add(1, 2));
如果后面要发布新版本的包,把 package.json 里的版本改一下,再执行发布命令就可以。
如果要删除发布的包可以到 npm 源站上操作,更为方便。
版本管理
用于管理 Node.js 版本的工具挺多的,比如 nvm 和 n 等,其中 n 不支持 Windows,Windows 下推荐使用 nvm-windows: https://github.com/coreybutler/nvm-windows
需要前往项目页 Release 下载安装包,项目页上有使用说明,可以用于升级 Node.js,在多个版本之间切换等等。
如果是 Linux 可以使用 n 来管理,安装也方便,直接使用 npm
npm i -g nnpm 源站上有 n 命令的使用说明:https://www.npmjs.com/package/n
express 框架
Express 文档:https://expressjs.com/zh-cn/starter/installing.html
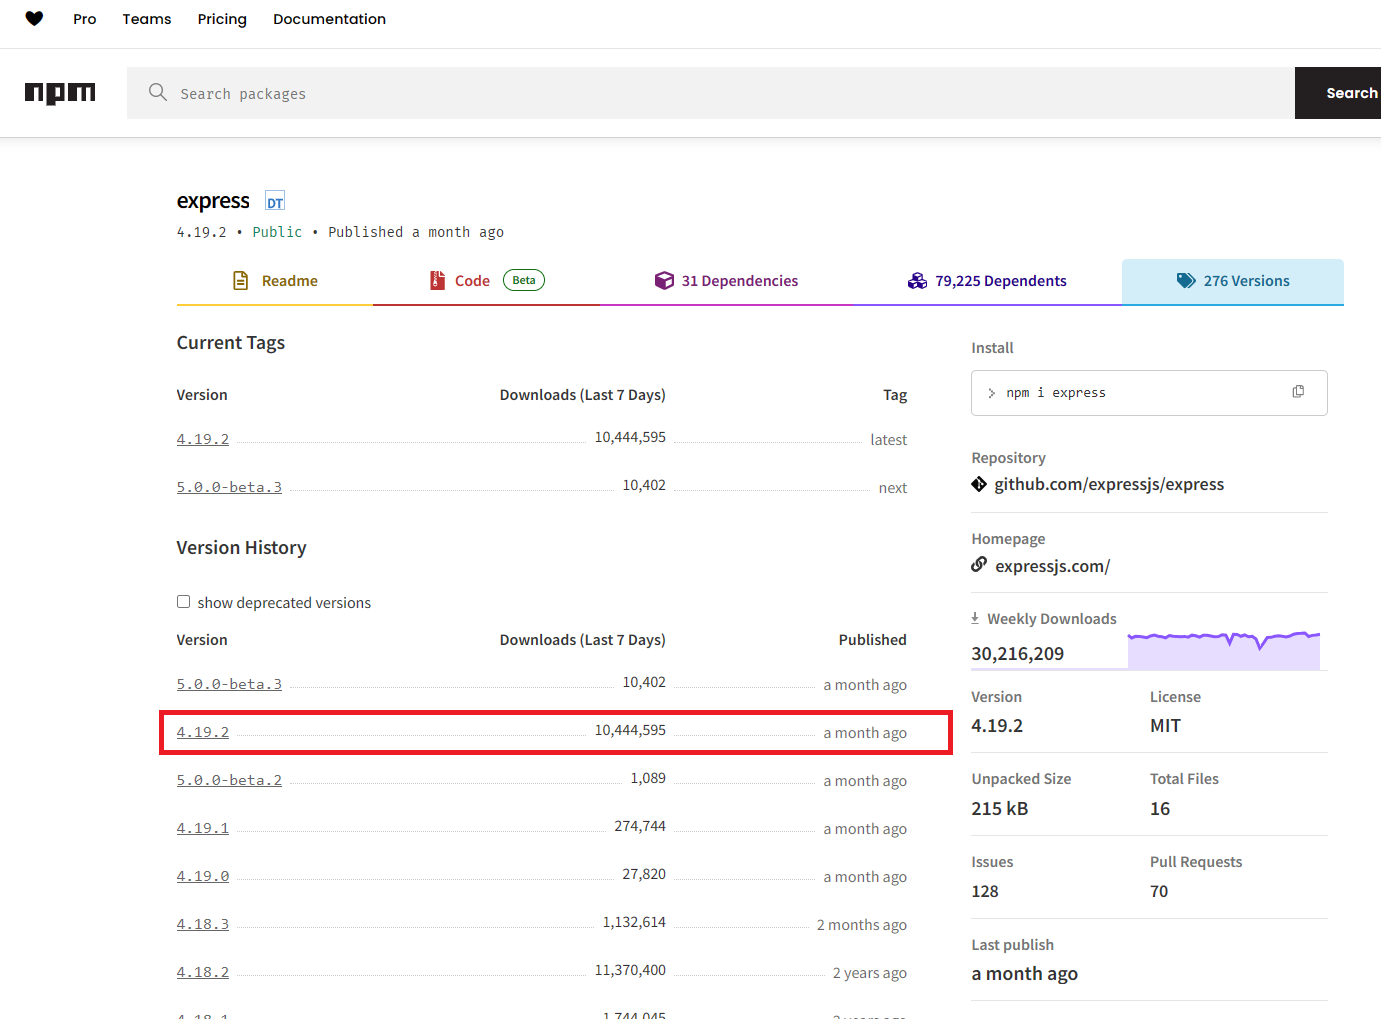
基于 express 4.9.12 实践,目前 5.x 版本还没有出稳定版
hello world
import express from 'express';

const app = express();
app.get('/', (req, res) => {
    res.send('Hello World!');
});

app.listen(80, () => {
    console.log('Server is running on http://localhost:80');
});
路由
文档:https://expressjs.com/zh-cn/guide/routing.html
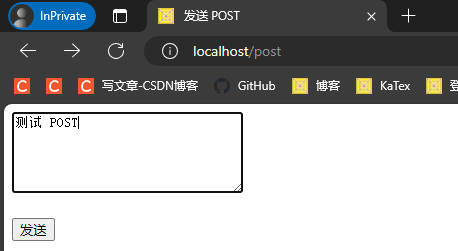
用于模拟发送 POST 请求的 html
GET 请求通常就是直接访问服务器,通过链接向服务器传输一些数据。比如 http://localhost/a?b=123&c=098 访问路径 a,传输 b=123 和 c=098 数据,由于 URL 长度限制,可传送的数据也有限。一般用于向服务器请求数据,服务器收到后,响应需要的内容。
POST 则是通过请求主体向服务器发送数据,在链接上是看不出来的,也没有传输数据量的限制,通常用于向服务器发送数据的时候使用。
<!DOCTYPE html>
<html>

<head>
    <title>发送 POST</title>
</head>

<body>
    <form action="http://localhost/post" method="POST">
        <textarea id="content" name="content" rows="5" cols="30" required></textarea><br><br>
        <input type="submit" value="发送">
    </form>
</body>

</html>
路由方法
import express from 'express';

const app = express();

// GET 方法路由:http://localhost/
app.get('/', (req, res) => {
    res.send('访问根目录');
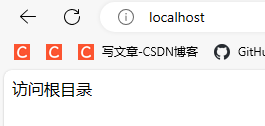
});

// POST 方法路由; http://localhost/post
app.post('/post', (req, res) => {
    res.send('发送 POST 请求');
});

app.listen(80, () => {
    console.log('Server is running on http://localhost:80');
});用浏览器打开上面用于发 POST 的 html 文件
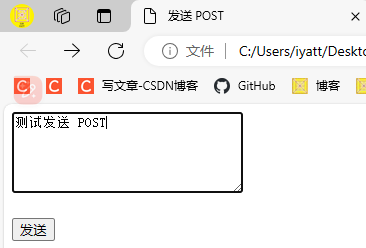
点击发送以后,服务器端由 POST 路由处理,并响应内容

所有方法
上面的是针对 GET 和 POST 使用专用的方法,express 中还提供了一个 all 可以处理所有的 http 方法
import express from 'express';

const app = express();

app.all('/post', (req, res, next) => {
    res.send(req.method);
    next();
});

app.listen(80, () => {
    console.log('Server is running on http://localhost:80');
});
发送 POST 请求后收到响应

发送 GET 请求和收到响应

路由路径
import express from 'express';

const app = express();

app.get('/', (req, res) => {
    res.send('root');
});

app.get('/about', (req, res) => {
    res.send('about');
});

// 正则表达式匹配路径,可匹配 abcd、abbcd、abbbcd......
app.get('/ab+cd', (req, res) => {
    res.send('ab+cd');
});

app.listen(80, () => {
    console.log('Server is running on http://localhost:80');
});


路由参数
通过链接传递的参数可以提取出来
import express from 'express';

const app = express();

// 冒号后是要匹配的参数
app.get('/user/:user/password/:password', (req, res) => {
    res.send('用户名:' + req.params.user + ' 密码:' + req.params.password); // 提取参数
});

app.listen(80, () => {
    console.log('Server is running on http://localhost:80');
});
路由模块化
homeRouter.mjs
import { Router } from 'express';

const homeRouter = Router();

homeRouter.get('/', (req, res) => {
    res.send('root');
});

export default homeRouter;
adminRouter.mjs
import { Router } from "express";

const adminRouter = Router();

adminRouter.get('/admin', (req, res) => {
    res.send('admin');
});

export default adminRouter;
index.mjs
import homeRouter from "./homeRouter.mjs";
import adminRouter from "./adminRouter.mjs";
import express from "express";

const app = express();

app.use(homeRouter);
app.use(adminRouter);

app.all('*', (req, res) => {
    res.status(404).send('Page not found');
});

app.listen(80, () => {
    console.log('Server started on http://localhost:80');
});


中间件
文档:
- 写中间件:https://expressjs.com/zh-cn/guide/writing-middleware.html
- 使用中间间:https://expressjs.com/zh-cn/guide/using-middleware.html
全局中间件
这里写了一个记录访问日志的功能,要处理的路由有多个,而访问记录是记录所有路由接收请求的记录,等于所有路由都需要执行同一套代码。那么可以把日志记录部分单独抽出来,作为一个全局中间件。中间件会在路由中语句执行之前先执行,所以中间件中要写个 next(),用于继续往下执行,否则在中间件执行后,就不会再执行路由中的语句。
import express from 'express';
import { appendFileSync } from 'node:fs';
import { resolve } from 'node:path';

const accessLogPath = resolve('access.log');
const app = express();

// 获取当前时间
function getTime() {
    const now = new Date();
    const year = now.getFullYear();
    const month = now.getMonth() + 1;
    const day = now.getDate();
    const hour = now.getHours();
    const minute = now.getMinutes();
    const second = now.getSeconds();
    return `${year}-${month}-${day} ${hour}:${minute}:${second}`;
}

// 定义中间件,用于记录访问日志
function recordAccessLog(req, res, next) {
    const { url, method, ip, httpVersion } = req;
    appendFileSync(accessLogPath, `${getTime()} ${method} ${url} ${ip} ${httpVersion}\n`, 'utf-8');
    next();
}

// 使用中间件
app.use(recordAccessLog);

app.get('/', (req, res) => {
    res.send('root');
});

app.get('/home', (req, res) => {
    res.send('home');
});

app.get('/about', (req, res) => {
    res.send('about');
});

app.all('*', (req, res) => {
    res.status(404).send('404 Not Found');
});

app.listen(80, () => {
    console.log('Server is running on http://localhost:80');
})
静态资源中间件
前面试过不依赖第三方模块的静态资源站实现:https://blog.iyatt.com/?p=14717#%E9%83%A8%E7%BD%B2%E9%9D%99%E6%80%81%E8%B5%84%E6%BA%90%E7%AB%99
这里采用 express 实现,极大简化代码,只需要传入静态资源的路径即可
文档:https://expressjs.com/zh-cn/starter/static-files.html
import express from 'express';
import { resolve } from 'node:path';

const root = resolve('homepage');
const app = express();

app.use(express.static(root));

app.listen(80, () => {
    console.log('Server is running on http://localhost:80');
});
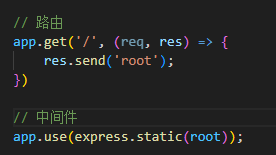
在访问 http://localhost/ 的时候没有指定访问路径,默认就会加载 http://localhost/index.html
如果在某种情况下,需要单独指定 http://localhost/ 访问的内容,就会存在问题。静态资源中间件是作为全局中间件使用的,它会在路由之前执行,所以访问 http://localhost/ 会直接返回 http://localhost/index.html 的内容,而不是路由指定的内容。
这个其实可以通过调整顺序解决,把路由部分放到使用中间件的前面,这样就会按照路由的方式处理。
防盗链
防止别人偷用你的链接挂到自己的网站上,这样每次访问资源都会到自己的服务器上来请求资源,增大自己的服务器压力。
浏览器在请求资源文件的时候会携带一个 referer 字段,可以指出是从哪个地址发出的请求。那么防盗链就可以通过这个字段来判断,如果这个字段的域名(或IP)与自己的不匹配,那么就能判断是盗链,禁止访问。
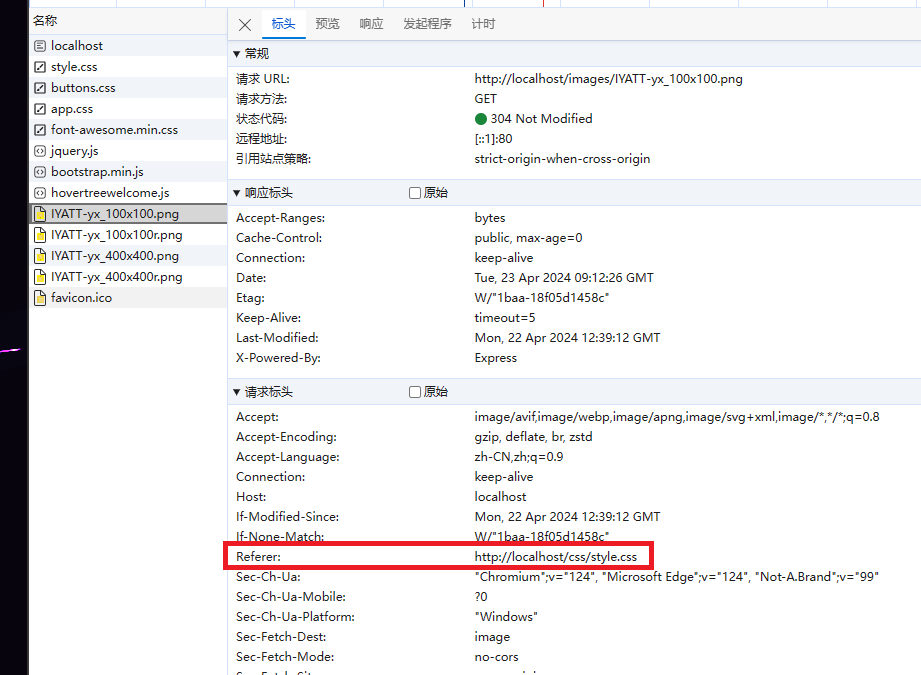
沿用上面静态资源站的源码进行实现:https://blog.iyatt.com/?p=14947#%E9%9D%99%E6%80%81%E8%B5%84%E6%BA%90%E4%B8%AD%E9%97%B4%E4%BB%B6
import express from 'express';
import { resolve } from 'node:path';

const root = resolve('homepage');
const app = express();
const serverName = 'localhost'; // 自己的服务器地址

// 防盗链
app.use( (req, res, next) => {
    const referer = req.get('Referer');
    if (referer) {
        const url = new URL(referer);
        const hostname = url.hostname;
        if (hostname !== serverName) { // 如果 referer 的地址和自己的服务器地址不一样就禁止访问
            res.status(403).send('Forbidden');
            return;
        }
    }
    next();
});

app.use(express.static(root));

app.listen(80, () => {
    console.log('Server is running on http://localhost:80');
});
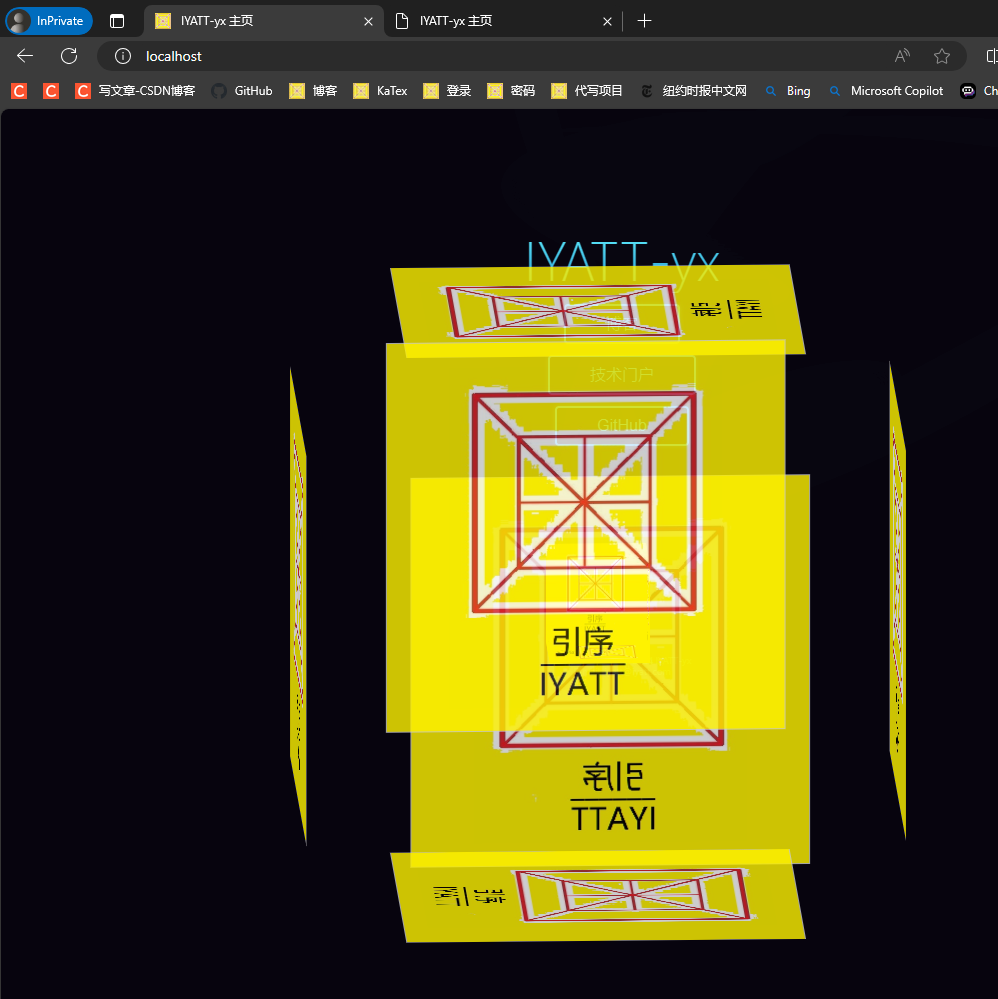
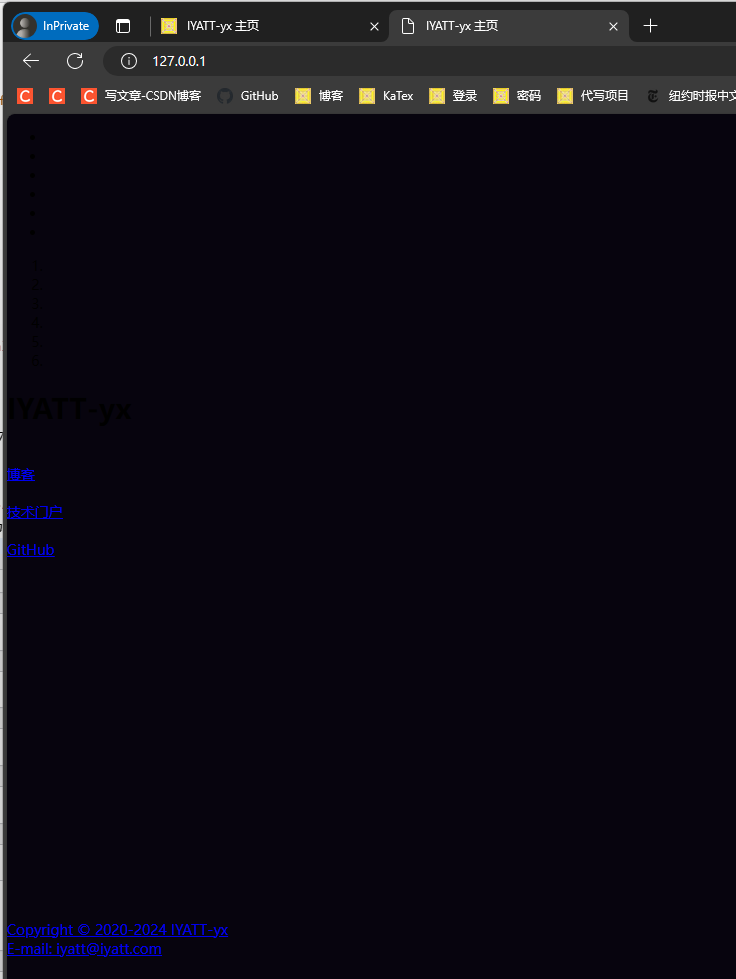
127.0.0.1 都是本地回环地址,localhost 是会解析为 127.0.0.1 的
正常访问
采用 127.0.0.1 访问,虽然本质上是同一个指向,但是因为访问地址不同,资源文件会被禁止加载
路由中间件
路由中间件用于执行指定路由的操作。比如,一个网站的前台正常展示,不需要额外处理,而后台管理和设置也要要验证登录状态才能打开,就可以使用路由中间件处理。
import express from 'express';

const app = express();

function check(req, res, next) {
    if (req.query.code === '123') {
        next();
    }
    else {
        res.status(403).send('Forbidden');
    }
}

// 路由中间件
app.get('/', (req, res) => {
    res.send('root');
});

app.get('/admin', check, (req, res) => { // 在需要使用的地方加上路由中间件
    res.send('admin');
});

app.get('/set', check, (req, res) => { // 在需要使用的地方加上路由中间件
    res.send('set');
});

app.all('*', (req, res) => {
    res.status(404).send('404 Not Found');
});

app.listen(80, () => {
    console.log('Server is running on http://localhost:80');
})
访问前台

访问管理页面,没有登录信息

有正确的登录信息

访问设置页面,登录信息不匹配

正确的登录信息

获取请求体内容
使用中间件 urlencoded 解码:https://expressjs.com/zh-cn/api.html#express.urlencoded
这里用到前面发 POST 的 html:https://blog.iyatt.com/?p=14947#%E8%B7%AF%E7%94%B1
import express from 'express';
import { urlencoded } from 'express';
import { resolve } from 'node:path';

const app = express();
const up = urlencoded();

// 响应 html 页面
app.get('/post', (req, res) => {
    res.sendFile(resolve('index.html'));
});

// 响应 POST 请求
app.post('/post', up, (req, res) => {
    console.log(req.body.content);
    res.send('已收到 POST');
});

app.listen(80, () => {
    console.log('Server is running on http://localhost:80');
});


模板引擎 ejs
文档:https://ejs.co/#docs
基于 3.1.10 实践
安装
npm i ejsejs 的效果感觉和 Vue 中的模板语法差不多。ejs 通常在前后端不分离或者服务端渲染的场景中使用,可以实现 html 和 js 的分离,动态修改 html 内容。
体验
index.js
import ejs from 'ejs';

const value1 = '中国';

// 将字符串中的 label 替换为 value1 的内容
const result1 = ejs.render('你好, <%= label %>', { label: value1});
console.log(result1);

// 简写
const result2 = ejs.render('你好, <%= value1 %>', { value1 });
console.log(result2);
html 文本插值
index.html
<!DOCTYPE html>
<html lang="en">
    <head>
        <meta charset="UTF-8" />
        <meta http-equiv="X-UA-Compatible" content="IE=edge" />
        <meta name="viewport" content="width=device-width, initial-scale=1.0" />
        <title>Document</title>
    </head>
    <body>
        <h1> 你好 <%= value1 %> </h1>
        <h2> <%= value2 %> </h2>
    </body>
</html>
index.js
import ejs from 'ejs';
import { readFileSync } from 'fs';

const html = readFileSync('index.html').toString();
const value1 = '中国';
const value2 = '走向世界';

const result = ejs.render(html, { value1, value2});
console.log(result);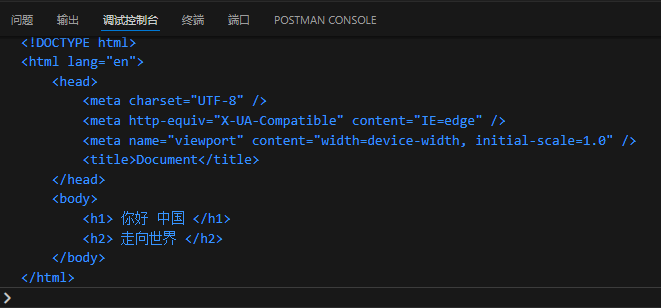
列表渲染
index.html
<!DOCTYPE html>
<html lang="en">

<head>
    <meta charset="UTF-8" />
    <meta http-equiv="X-UA-Compatible" content="IE=edge" />
    <meta name="viewport" content="width=device-width, initial-scale=1.0" />
    <title>水果</title>
</head>

<body>
    <ul>
        <% values.forEach(item=> { %>
        <li>
            <%= item %>
        </li>
        <% }) %>
    </ul>
</body>

</html>
index.js
import ejs from 'ejs';
import { readFileSync } from 'fs';

const values = ['苹果', '香蕉', '梨', '西瓜'];
const html = readFileSync('index.html').toString();

const result = ejs.render(html, { values });
console.log(result);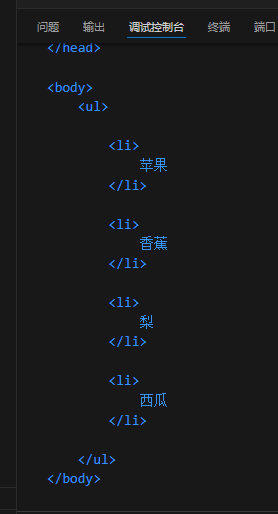
条件渲染
index.html
<!DOCTYPE html>
<html lang="en">

<head>
    <meta charset="UTF-8" />
    <meta http-equiv="X-UA-Compatible" content="IE=edge" />
    <meta name="viewport" content="width=device-width, initial-scale=1.0" />
    <title>水果</title>
</head>

<body>
    <header>
        <% if (flag) { %>
        <span>你好</span>}
        <% } else { %>
        <button> 开始 </button>
        <% } %>
    </header>
</body>

</html>
index.js
import ejs from 'ejs';
import { readFileSync } from 'fs';

const flag = true;
const html = readFileSync('index.html').toString();

const result = ejs.render(html, { flag });
console.log(result);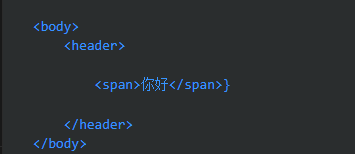
在 express 中使用 ejs
文件结构
──index.js
│
└─views
        home.ejs
模板文件扩展名使用 .ejs
home.ejs
<!DOCTYPE html>
<html lang="en">

<head>
    <meta charset="UTF-8" />
    <meta http-equiv="X-UA-Compatible" content="IE=edge" />
    <meta name="viewport" content="width=device-width, initial-scale=1.0" />
    <title>home</title>
</head>

<body>
    <h1><%= title %></h1>
</body>

</html>
index.js
import express from 'express';
import { resolve } from 'node:path';

const app = express();

app.set('view engine', 'ejs'); // 设置模板引擎
app.set('views', resolve('views')); // 设置模板文件存放的目录

app.get('/', (req, res) => {
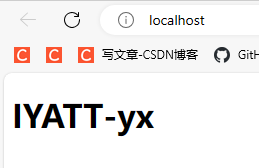
    const title = 'IYATT-yx';
    res.render('home', { title }); // 渲染模板文件 home.ejs
});

app.listen(80, () =>
    console.log('服务器已启动,访问 http://localhost/')
);
文件上传
使用 formidable 来处理请求内容
基于 3.5.1 实践
说明:https://www.npmjs.com/package/formidable?activeTab=readme
npm i formidable目录结构
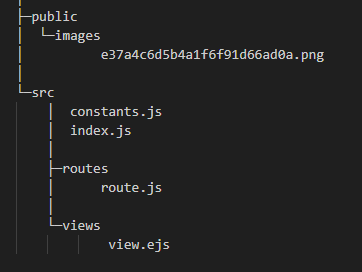
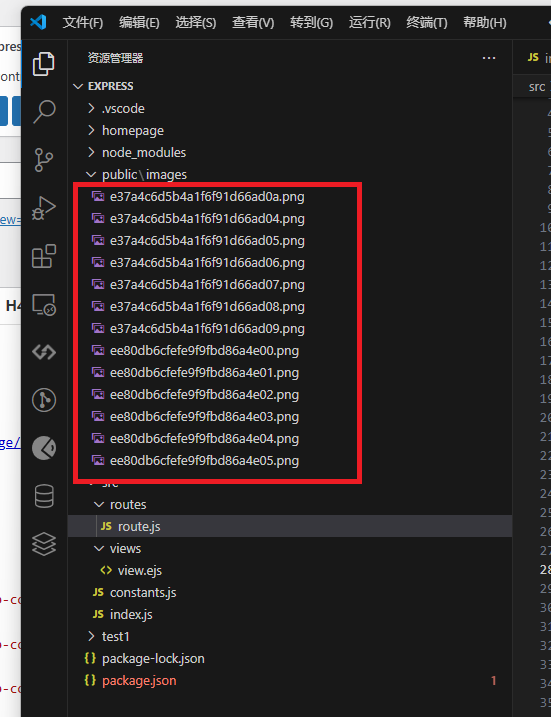
通过网页上传的图片会保存到 public/images 下
入口
index.js
import router from './routes/route.js';
import { rootDir } from './constants.js';

import express from 'express';
import { resolve } from 'node:path';

const app = express();

app.set('view engine', 'ejs'); // 设置模板引擎
app.set('views', resolve(rootDir, 'views')); // 设置模板文件存放的目录

app.use(router)
app.use(express.static(resolve(rootDir, '..', 'public'))); // 静态资源

app.listen(80, () =>
    console.log('服务器已启动,访问 http://localhost/')
);
常量
constants.js
import { fileURLToPath } from 'url';
import { dirname } from 'path';

const __filename = fileURLToPath(import.meta.url);
const __dirname = dirname(__filename);

export const rootDir = __dirname;
export const hostUrl = 'http://localhost/';
路由
route.js
import { rootDir, hostUrl } from "../constants.js"

import { Router } from "express";
import formidable from 'formidable';
import { resolve } from 'node:path';

const router = Router();

const form = formidable({
    multiples: true, // 是否支持多文件上传
    uploadDir: resolve(rootDir, '..', 'public', 'images'), // 上传文件的保存路径
    keepExtensions: true, // 保留扩展名
});

router.get('/', (req, res) => {
    res.render('view'); // 渲染模板文件 home.ejs
});

router.post('/api/upload', (req, res, next) => {
    // 请求数据处理
    form.parse(req, (err, fields, files) => {
        if (err) {
            next(err);
            return;
        }

        // 拼接访问链接
        const urls = [];
        files.files.forEach( (file) => {
            urls.push(hostUrl + 'images/' + file.newFilename);
        });

        // 响应
        res.json({
            fields, files,
            "访问链接": urls
        });
    });
});

export default router;
模板
view.ejs
<!DOCTYPE html>
<html lang="en">

<head>
    <meta charset="UTF-8" />
    <meta http-equiv="X-UA-Compatible" content="IE=edge" />
    <meta name="viewport" content="width=device-width, initial-scale=1.0" />
    <title>文件上传</title>
</head>

<body>
    <form action="/api/upload" method="post" enctype="multipart/form-data">
        用户名:<input type="text" name="username" /><br>
        文件:<input type="file" name="files" multiple/><br>
        <button>提交</button>
    </form>
</body>

</html>
上传单张图片
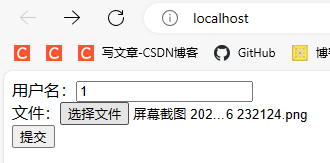
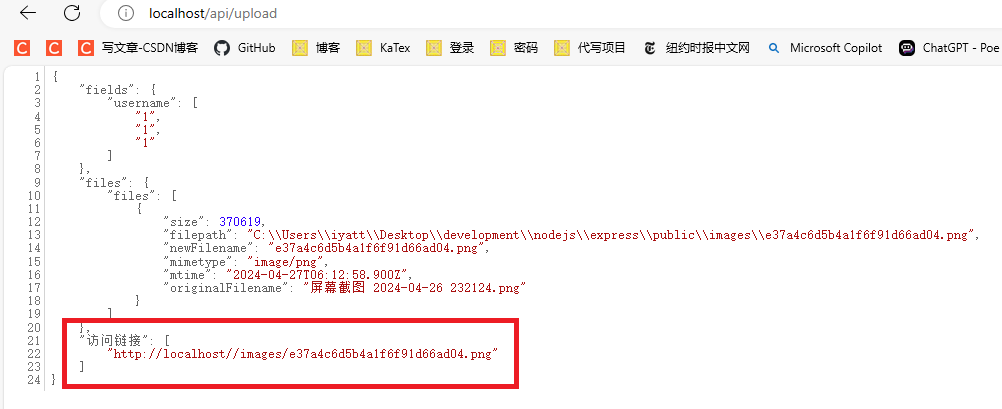
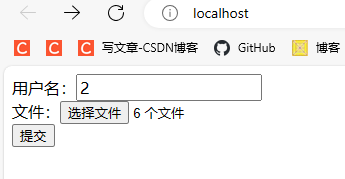
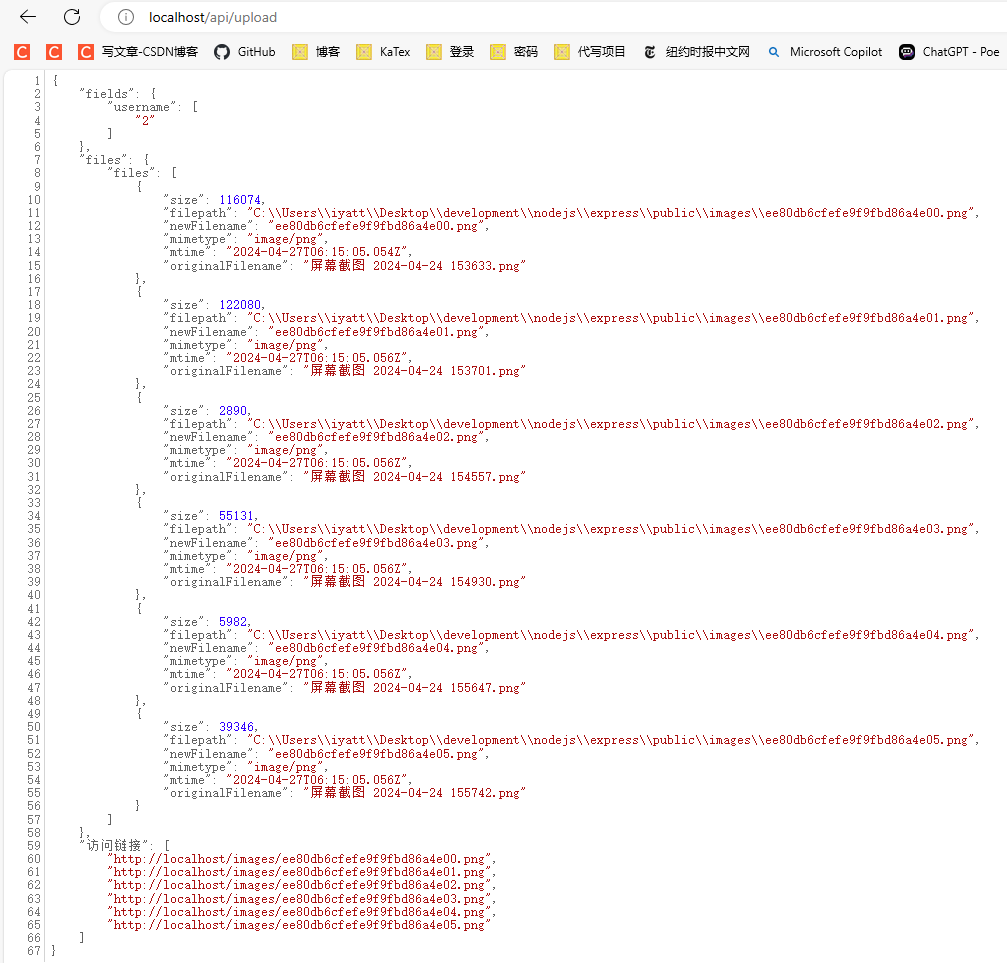
上传多张图片
MySQL 数据库
这是我前面学习 MySQL 的记录:https://blog.iyatt.com/?p=12631
基于 MySQL 8.2.0 实践
试了两个驱动
驱动1:mysql
mysql 2.18.1,文档:https://www.npmjs.com/package/mysql
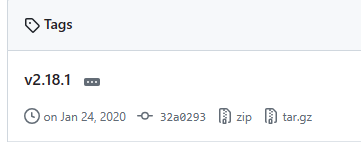
npm i mysql@2.18.1挺久没更新了,上一次更新还是 2020.1.24
可以用,但不推荐
准备
创建一个数据库 test_db 用于测试
CREATE DATABASE IF NOT EXISTS test_db;创建一张表 test_tb
CREATE TABLE test_tb
(
    `id`         INT NOT NULL AUTO_INCREMENT PRIMARY KEY COMMENT 'primary key',
    `bookName`   VARCHAR(256) DEFAULT NULL COMMENT 'book name',
    `author`     VARCHAR(256) DEFAULT NULL COMMENT 'author'
);
插入数据
INSERT INTO test_tb (bookName, author) VALUES
('book1', 'author1'),
('book2', 'author2'),
('book3', 'author3');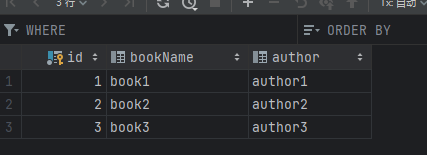
连接数据库
index.js
import mysql from 'mysql';

const mysqlConfig = {
    host: 'localhost', // 数据库服务器地址
    user: 'root', // 数据库用户名
    password: '1', // 数据库密码
    database: 'test_db' // 数据库名
};

const connection = mysql.createConnection(mysqlConfig);

// 连接数据库
connection.connect((err) => {
    if (err) {
        console.error('数据库连接失败:', err);
        return;
    }
    console.log('数据库连接成功');
    console.log('connected as id ' + connection.threadId);
});

// 查询
connection.query('SELECT * FROM test_tb', (err, results) => {
    if (err) {
        console.error('查询失败:', err);
        return;
    }
    results.forEach((row) => {
        console.log(row);
    });
});

// 关闭数据库连接
connection.end((err) => {
    if (err) {
        console.error('关闭数据库连接失败:', err);
        return;
    }
    console.log('数据库连接已关闭');
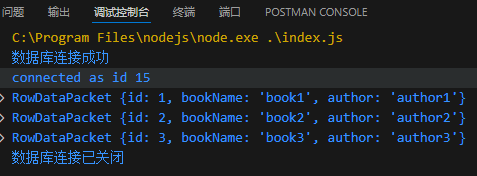
});
查询
方式一
connection.query('SELECT * FROM test_tb WHERE author = "author2"', (err, results) => {
    if (err) {
        console.error('查询失败:', err);
        return;
    }
    results.forEach((row) => {
        console.log(row);
    });
});
方式二
// 只有一个替换,['author1'] 也可以写为 'author1'
connection.query('SELECT * FROM test_tb WHERE author = ?', ['author1'], (err, results) => {
    if (err) {
        console.error('查询失败:', err);
        return;
    }
    results.forEach((row) => {
        console.log(row);
    });
});
方式三
const options = {
    sql: 'SELECT * FROM test_tb WHERE author = ?',
    timeout: 10000, // 10s
    values: ['author3']
};

connection.query(options, (err, results) => {
    if (err) {
        console.error('查询失败:', err);
        return;
    }
    results.forEach((row) => {
        console.log(row);
    });
});
增删改
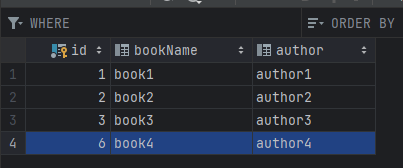
增删改的操作在驱动使用层面和查询都是一样,实际具体行为依赖于 MySQL 语句
增
const options = {
    sql: 'INSERT INTO test_tb (bookName, author) values (?, ?)',
    values: ['book4', 'author4']
};

connection.query(options, (err, results) => {
    if (err) {
        console.error('查询失败:', err);
        return;
    }
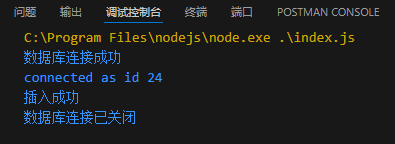
    console.log('插入成功');
});
改
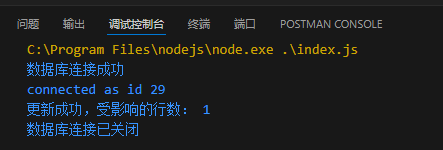
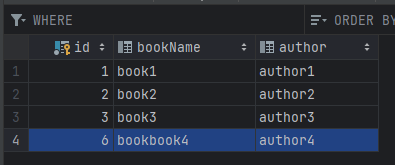
const options = {
    sql: 'UPDATE test_tb SET bookName = ? WHERE author = ?',
    values: ['bookbook4', 'author4']
};

connection.query(options, (err, results) => {
    if (err) {
        console.error('查询失败:', err);
        return;
    }
    console.log('更新成功,受影响的行数:', results.affectedRows);
});
删
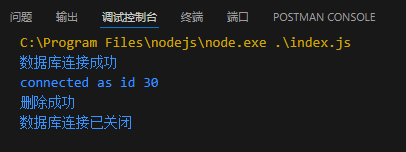
const options = {
    sql: 'DELETE FROM test_tb WHERE id = ?',
    values: [1]
};

connection.query(options, (err, results) => {
    if (err) {
        console.error('查询失败:', err);
        return;
    }
    console.log('删除成功');
});
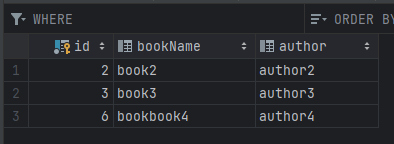
转义查询
具体可以参考:https://www.npmjs.com/package/mysql#escaping-query-values
转义查询的意义在于防止 SQL 注入。
比如一个登录表单,后端写的 “SELECT FROM users WHERE username = ‘[用户输入]’ AND password = ‘[用户输入]’”
用户不老实,在用户名处输入了 “admin’ –”
那么就变成了 “SELECT FROM users WHERE username = ‘admin’ –‘ AND password = ‘[用户输入]’”
而 “–” 在 MySQL 中是注释,导致实际变成 “SELECT * FROM users WHERE username = ‘admin’”
原本按照设计是要检查用户名和密码同时匹配才执行的,现在直接把密码验证忽略了。
这种情况如果对用户输入的内容转义处理,得到的会是 “SELECT * FROM users WHERE username = ‘admin\’ –‘ AND password = ‘[用户输入]’”
用户输入的单引号不会被视为 MySQL 语句的一部分,而是一个单引号字符,即判断用户名是否为 "admin’ –",消除了单引号的影响,注释符也不会被作为 MySQL 语句的一部分,密码判断也能正常工作。
驱动2:mysql2
mysql2 3.9.7,文档:https://sidorares.github.io/node-mysql2/docs
npm i mysql2@3.9.7准备
同上:https://blog.iyatt.com/?p=14717#%E5%87%86%E5%A4%87
查询
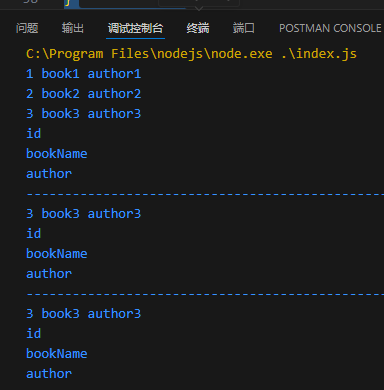
这个驱动的防 SQL 注入(方式三)原理和 mysql 驱动不一样。采用预处理的方式,提前将指令部分编译,占位符的位置是用于填入用户输入数据的,一开始就把指令和数据分离了。指令只能是代码中写入的部分,用户传入的部分只能是数据,就不会存在用户输入的数据被当作指令的一部分导致 SQL 注入。
import mysql from 'mysql2/promise';

const mysqlConfig = {
    host: 'localhost', // 数据库服务器地址
    user: 'root', // 数据库用户名
    password: '1', // 数据库密码
    database: 'test_db' // 数据库名
};

// 打印查询行数据
const printRows = (rows) => {
    rows.forEach(function (row) {
        console.log(row.id, row.bookName, row.author);
    });
};

// 打印查询字段信息
const printFields = (fields) => {
    fields.forEach(function (field) {
        console.log(field.name);
    });
};

try {
    const connection = await mysql.createConnection(mysqlConfig);

    // 方式一:简单查询
    var [results, fields] = await connection.query(
        'SELECT * FROM `test_tb`'
    );
    printRows(results);
    printFields(fields);

    console.log('-'.repeat(100));

    // 方式二:占位符
    var [results, fields] = await connection.query(
        'SELECT * FROM `test_tb` WHERE `author` = ? AND `id` > ?',
        ['author3', 1]
    );
    printRows(results);
    printFields(fields);

    console.log('-'.repeat(100));

    // 方法三:使用预处理语句
    // 可以防 SQL 注入
    var [results, fields] = await connection.execute(
        'SELECT * FROM `test_tb` WHERE `author` = ? AND `id` > ?',
        ['author3', 1]
    );
    printRows(results);
    printFields(fields);

    // 关闭数据库连接
    await connection.end();
}
catch (error) {
    console.error(error);
}
增删改
增删改的操作和查询的操作一样,具体的行为依赖于 MySQL 语句。
插入
    var [results] = await connection.execute(
        'INSERT INTO test_tb (bookName, author) values (?, ?)',
        ['book4', 'author4']
    );
    console.log('Inserted ' + results.affectedRows + ' row(s).');
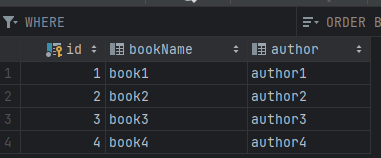
修改
    var [results] = await connection.execute(
        'UPDATE test_tb SET bookName = ? WHERE author = ?',
        ['bookbook4', 'author4']
    );
    console.log(results.affectedRows);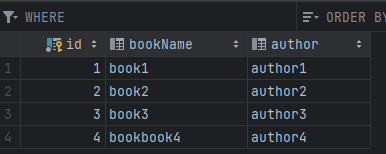
删除
    var [results] = await connection.execute(
        'DELETE FROM test_tb WHERE id = ?',
        ['1']
    );
    console.log(results.affectedRows);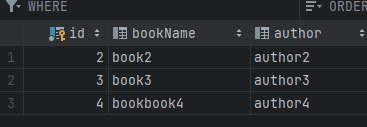
sequelize 模型
基于 sequelize 6.37.3 实践,官方中文文档:https://github.com/demopark/sequelize-docs-Zh-CN
npm i sequelize@6.37.3按我看文档实践后的理解,模型的概念就是把表映射为一个对象,通过对象的一些方法进行操作间接实现对数据库的操作,不需要直接使用 SQL 语句。
下面是基本使用示例,注释附带的链接是对应的参考部分
import { DataTypes, Op, Sequelize } from "sequelize";

// 连接数据库
// https://github.com/demopark/sequelize-docs-Zh-CN/blob/master/core-concepts/getting-started.md#%E8%BF%9E%E6%8E%A5%E5%88%B0%E6%95%B0%E6%8D%AE%E5%BA%93
// 数据库名,用户名,密码,主机地址,数据库类型
const sequelize = new Sequelize('test_db', 'root', '1', {
    host: 'localhost',
    dialect: 'mysql'
});

// 连接测试
// https://github.com/demopark/sequelize-docs-Zh-CN/blob/master/core-concepts/getting-started.md#%E6%B5%8B%E8%AF%95%E8%BF%9E%E6%8E%A5
try {
    await sequelize.authenticate();
    console.log('成功建立连接。');
} catch (error) {
    console.error('无法连接到数据库:', error);
}

// 模型定义
// 结合数据库创建的表结构
// https://github.com/demopark/sequelize-docs-Zh-CN/blob/master/core-concepts/model-basics.md#%E6%A8%A1%E5%9E%8B%E5%AE%9A%E4%B9%89
class TestTb extends Sequelize.Model {}
TestTb.init({
    // id 字段可以不用写,会自动维护

    bookName: {
        type: DataTypes.STRING(256),
        allowNull: true
    },
    author: {
        type: DataTypes.STRING(256),
        allowNull: true
    }
}, {
    sequelize,
    modelName: 'TestTb',
    // 如果不指定表名,则会默认用模型名的复数作为表名。
    // https://github.com/demopark/sequelize-docs-Zh-CN/blob/master/core-concepts/model-basics.md#%E8%A1%A8%E5%90%8D%E6%8E%A8%E6%96%AD
    tableName: 'test_tb',
    // 禁止时间戳,否则 sequelize 会添加“创建”和“更新”两个时间戳并自动维护。
    // https://github.com/demopark/sequelize-docs-Zh-CN/blob/master/core-concepts/model-basics.md#%E6%97%B6%E9%97%B4%E6%88%B3
    timestamps: false
});

const printRows = (results) => {
    results.forEach((item) => {
        console.log(item.dataValues.id + ' ' + item.dataValues.bookName + ' ' + item.dataValues.author);
    });
    console.log('-'.repeat(100));
};

// 查询
// SELECT * FROM test_tb;
// https://github.com/demopark/sequelize-docs-Zh-CN/blob/master/core-concepts/model-querying-basics.md#%E7%AE%80%E5%8D%95-select-%E6%9F%A5%E8%AF%A2
var results = await TestTb.findAll();
printRows(results);

// 查询指定字段
// SELECT id, bookName FROM test_tb;
// https://github.com/demopark/sequelize-docs-Zh-CN/blob/master/core-concepts/model-querying-basics.md#select-%E6%9F%A5%E8%AF%A2%E7%89%B9%E5%AE%9A%E5%B1%9E%E6%80%A7
var results = await TestTb.findAll({
    attributes: ['id','bookName']
});
printRows(results);

// where
// SELECT * FROM test_tb WHERE id = 2;
// https://github.com/demopark/sequelize-docs-Zh-CN/blob/master/core-concepts/model-querying-basics.md#%E5%BA%94%E7%94%A8-where-%E5%AD%90%E5%8F%A5
var results = await TestTb.findAll({
    where: {
        id : {
            [Op.eq]: 2
        }
    }
});
printRows(results);

// 插入
// INSERT INTO test_tb (bookName, author) VALUES ('test', 'test');
// https://github.com/demopark/sequelize-docs-Zh-CN/blob/master/core-concepts/model-querying-basics.md#%E7%AE%80%E5%8D%95-insert-%E6%9F%A5%E8%AF%A2
var newRow = await TestTb.create({
    bookName: 'test',
    author: 'test'
});
console.log(newRow.dataValues.id);

// 更新
// UPDATE test_tb SET bookName = 'test2' WHERE id = 3;
// https://github.com/demopark/sequelize-docs-Zh-CN/blob/master/core-concepts/model-querying-basics.md#%E7%AE%80%E5%8D%95-update-%E6%9F%A5%E8%AF%A2
await TestTb.update({
    bookName: 'test2'
}, {
    where: {
        id : {
            [Op.eq]: 3
        }
    }
});

// 删除
// DELETE FROM test_tb WHERE id = 1;
// https://github.com/demopark/sequelize-docs-Zh-CN/blob/master/core-concepts/model-querying-basics.md#%E7%AE%80%E5%8D%95-delete-%E6%9F%A5%E8%AF%A2
await TestTb.destroy({
    where: {
        id : {
            [Op.eq]: 1
        }
    }
});

// 关闭连接
sequelize.close()
JSON
JSON 官网:https://www.json.org/json-zh.html
JSON 的基本组成:
- 对象:由大括号括起来,可以包含一个或多个键值对
- 键:对象中的属性名称,必须是字符串,且使用双引号括起来
- 值:与键关联的属性值,可以是字符串、数字、布尔值、对象、数组和 null
- 数组:由中括号括起来,可以包含一个或多个键值对
使用 import 读取
在我使用的最新稳定版 Node.js 20.12.2 (2024.4.29)中,这还是一项实验性功能,只简单试一下,不打算深究,毕竟是未确定的功能
data.json
{
  "水果": [
    {
      "name": "苹果",
      "price": 5
    },
    {
      "name": "香蕉",
      "price": 3
    },
    {
      "name": "橙子",
      "price": 4
    }
  ],
  "蔬菜": [
    {
      "name": "胡萝卜",
      "price": 2
    },
    {
      "name": "土豆",
      "price": 1.5
    },
    {
      "name": "西红柿",
      "price": 3
    }
  ]
}
index,js
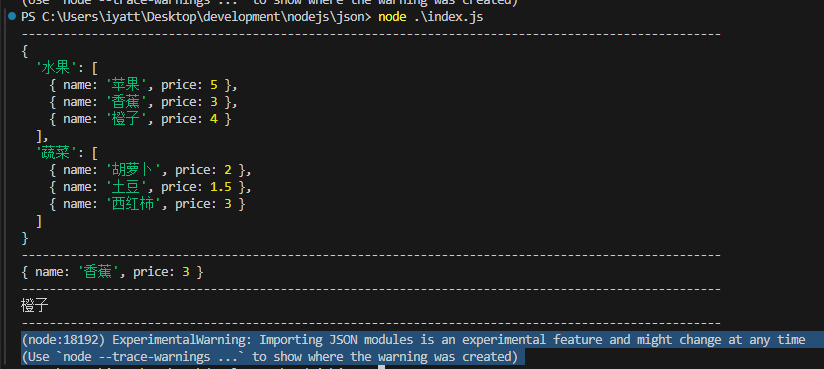
import myJson from "./data.json" assert { type: "json" };

console.log('-'.repeat(100));

console.log(myJson);

console.log('-'.repeat(100));

console.log(myJson.水果[1]);

console.log('-'.repeat(100));

console.log(myJson.水果[2].name);

console.log('-'.repeat(100));
可以用 .对象 来获取对象的属性值,使用下标获取数组子元素的值
序列化和反序列化
序列化是指把一个特定的数据结构(如对象等)转为可以网络传输或存储的格式(如字符串、二进制数据等),反序列化就是反过来
index.js
const object = {
  "fruits": [
    {
      "name": "苹果",
      "price": 5
    },
    {
      "name": "香蕉",
      "price": 3
    },
    {
      "name": "橙子",
      "price": 4
    }
  ],
  "vegetables": [
    {
      "name": "胡萝卜",
      "price": 2
    },
    {
      "name": "土豆",
      "price": 1.5
    },
    {
      "name": "西红柿",
      "price": 3
    }
  ]
};

// 序列化
// 将对象转为字符串
const serializedObject = JSON.stringify(object);
console.log(serializedObject);

// 反序列化
// 将字符串转为对象
const deserializedObject = JSON.parse(serializedObject);
console.log(deserializedObject);
console.log(deserializedObject.fruits[1].name);
json-server
json-server 可以提供接口来访问 json 文件,提供的接口符合 RESTful API。
可以用来学习熟悉 RESTful API,以及前端开发的时候用来模拟后端。
基于 json-server 1.0.0-alpha.23 实践,参考文档:https://github.com/typicode/json-server
npm i json-server@1.0.0-alpha.23使用 VScode 中的 Postman 插件模拟请求演示
用于演示的 json
data.json
{
    "posts": [
        {
            "id": "1",
            "title": "a title",
            "views": 100
        },
        {
            "id": "2",
            "title": "another title",
            "views": 200
        }
    ],
    "comments": [
        {
            "id": "1",
            "text": "a comment about post 1",
            "postId": "1"
        },
        {
            "id": "2",
            "text": "another comment about post 1",
            "postId": "1"
        }
    ],
    "profile": {
        "name": "typicode"
    }
}
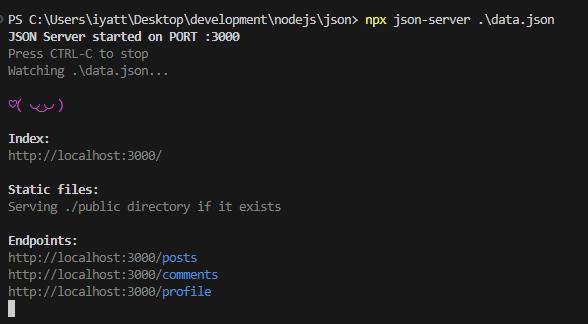
运行 json-server
GET
GET 方法用于请求数据
顶层对象属性
发起 GET 请求后跟上路径,路径为 json 中的顶层对象属性,即可获取对应顶层对象属性的值
GET /顶层对象属性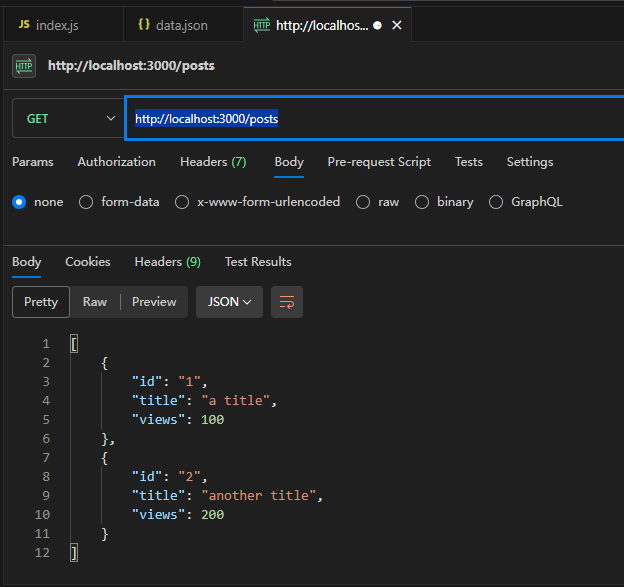
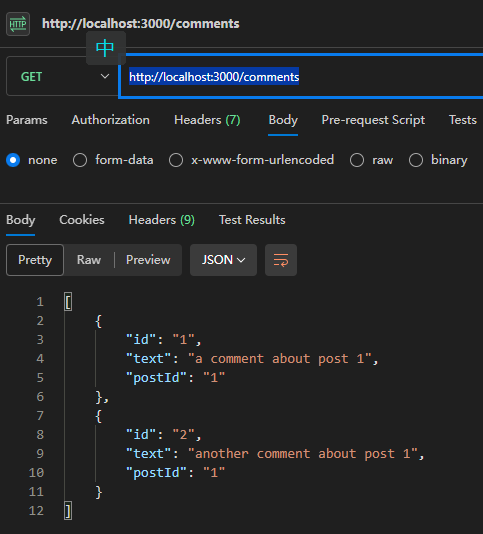
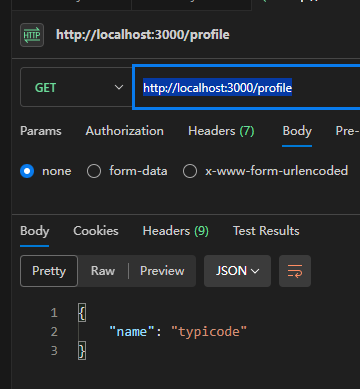
顶层对象属性的值为数组时访问子元素
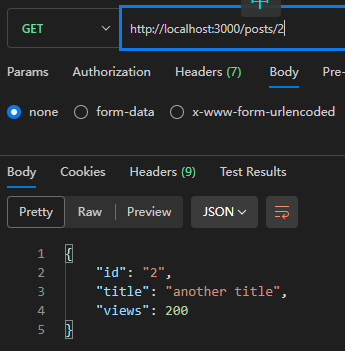
posts 和 comments 值都是数组,数组中每个子元素存在一个 id,可以通过这个 id 进一步获取所在子元素
GET /顶层对象属性/子元素id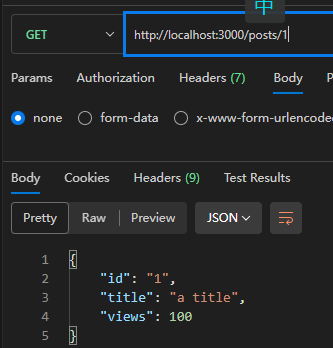
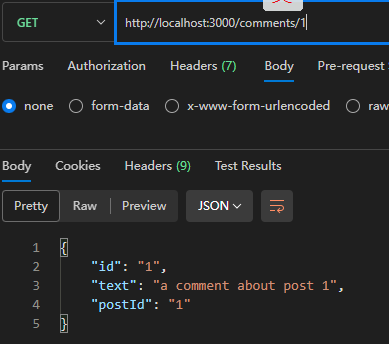
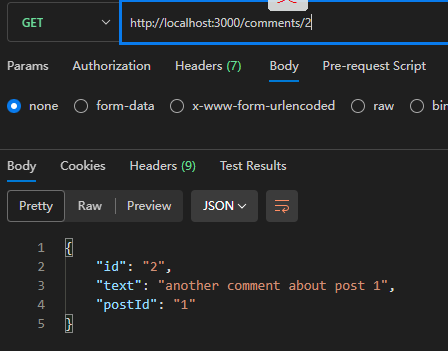
POST
POST 方法用于向服务器添加数据
POST /顶层对象属性/子元素id顶层对象属性值为数组的,可以向数组中添加数据
添加的时候需要些 id 字段,json-server 会自动添加唯一标识
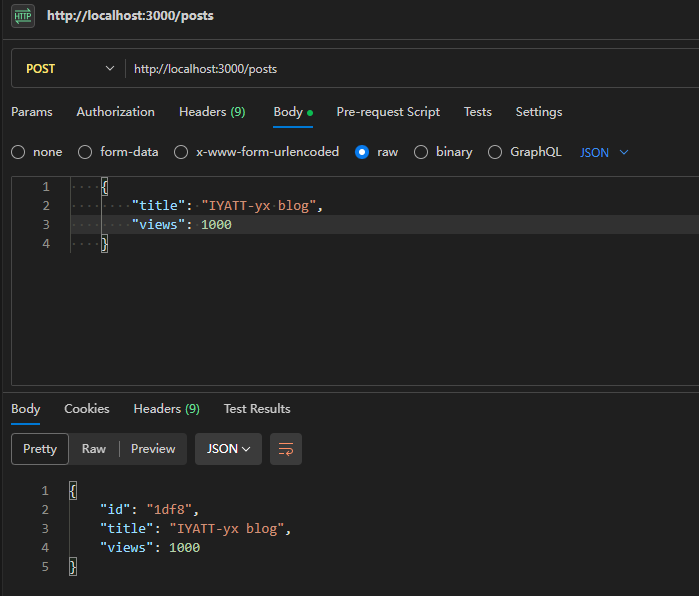
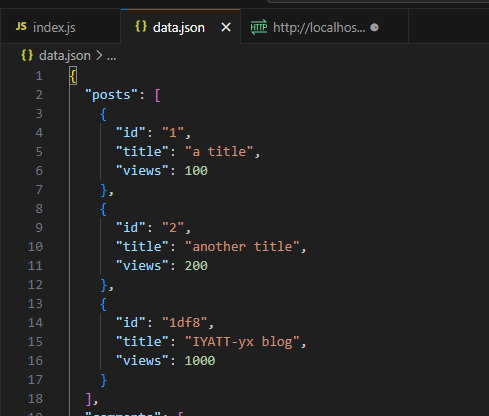
查看 json 文件可以看到添加的数据
PUT
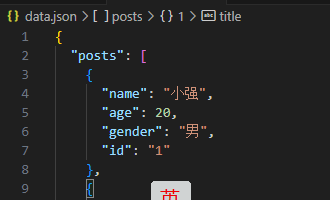
PUT 方法用于修改数据,修改的部分不管原来内容是什么,直接用提交的内容覆盖上去
修改数组子元素
PUT /顶层对象属性/子元素id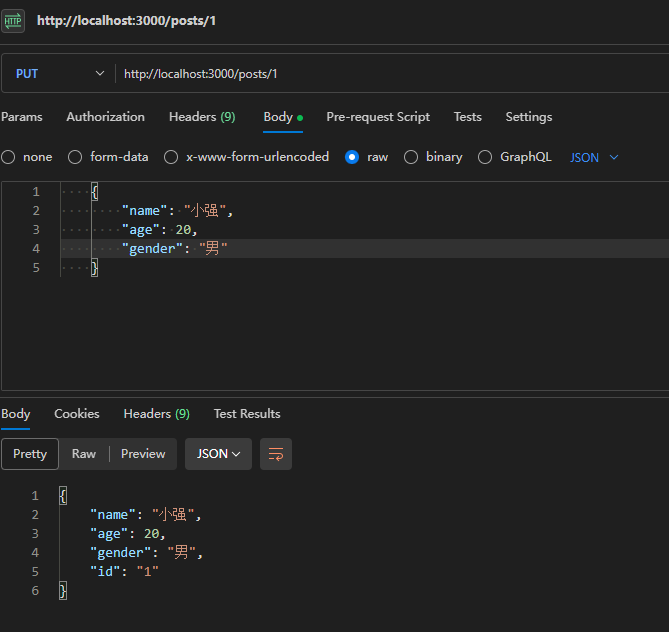
修改后的 json 文件,可以看到,提交的内容直接覆盖了原 ID = 1 的内容
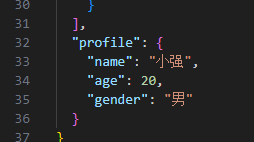
修改顶层对象属性值
PUT /顶层对象属性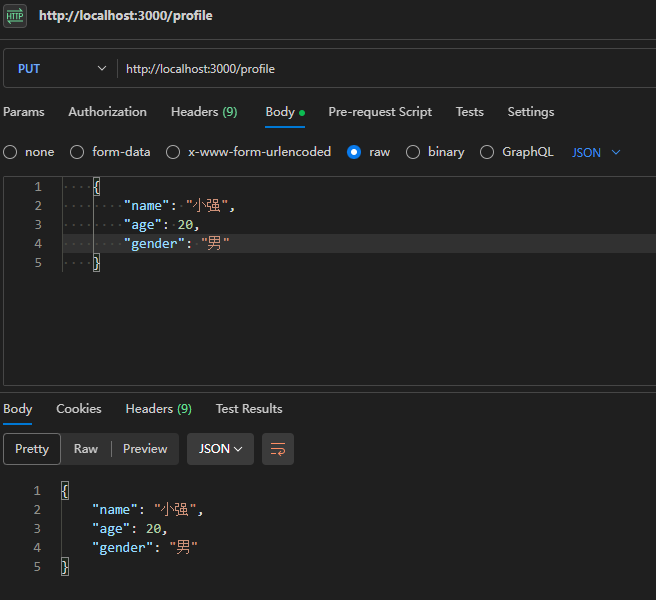
可以看到也是覆盖了原来的内容
PATCH
PATCH 用于修改数据,修改方式和 PUT 不同,如果提交的字段存在则修改为提交的,不存在则新增字段
修改数组子元素
PATCH /顶层对象属性/子元素id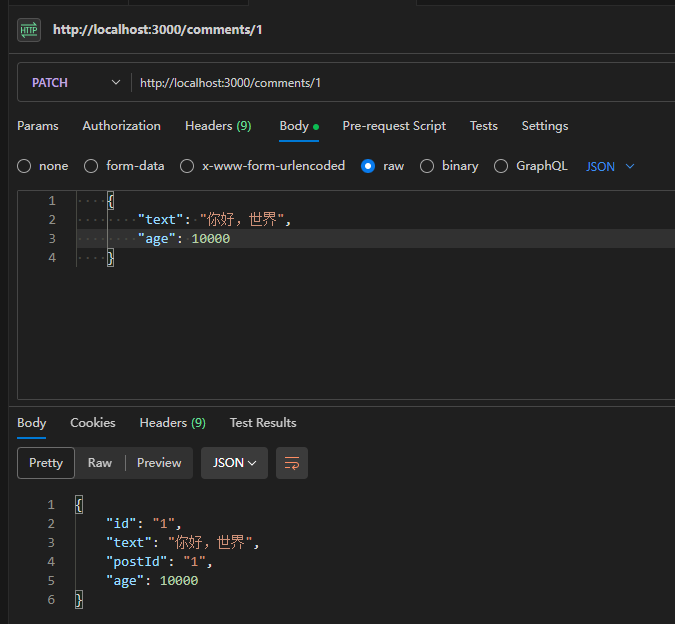
提交的 text 修改了原 text 内容,而 age 是原来没有的,则会新增上去
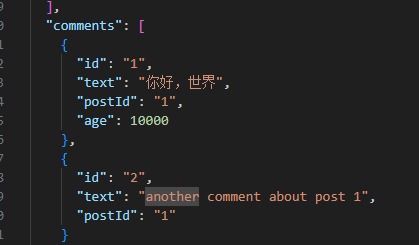
修改顶层对象属性值(有 bug?)
PATCH /顶层对象属性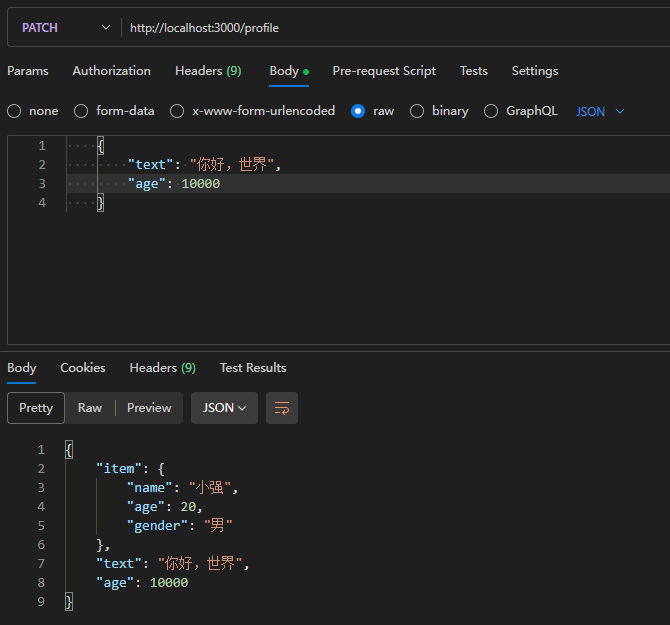
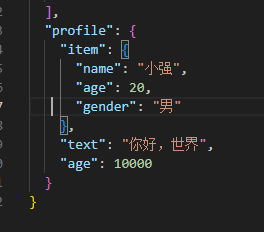
age 明明有一样的字段,结果变成了新增,似乎 json-server 有 bug
DELETE
用于删除数据
DELETE /顶层对象属性/子元素id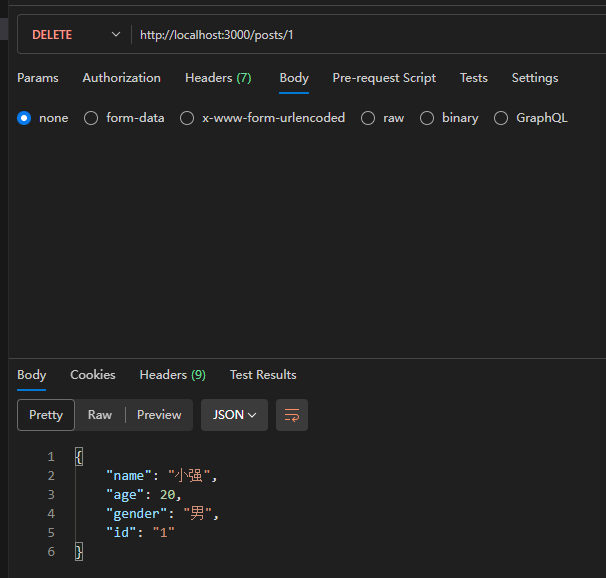
删除了 ID = 1 的子元素
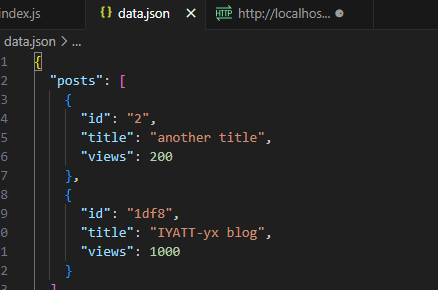
参数支持
可以参考:https://github.com/typicode/json-server?tab=readme-ov-file#params
Promise
在学 Node.js 的时候,我是跟着尚硅谷的一个公开课程实践的,那个课程还是用的 CJS,然后我结合课程讲的和 Node.js 的官方文档进行 ESM 的实践验证。直到后面项目实践部分,课程里使用的数据库是 MongoDB,我想用 MySQL。就另外找了个用 MySQL 的项目实践视频看看用什么驱动,也就是上文中的 mysql 驱动,我跟着文档实践了一下,后面在看发布版本的时候注意到已经停更 4 年多了,又去找别的驱动,于是又发现了上文中的 mysql2,再跟着文档实践操作,才发现有个 Promise 版本的用法,才知道 Promise 的存在。
示例 1
// 新建一个 Promise 对象
const fun1 = new Promise((resolve, reject) => {
    const condition = false; // 假设这是一个异步操作的结果
    if (condition) {
        resolve("成功");
    }
    else {
        reject("失败");
    }
});

fun1
    .then((result) => { // then 方法接收一个回调函数,在 resolve 被调用时执行
        console.log(result);
    })
    .catch((error) => { // catch 方法接收一个回调函数,在 reject 被调用时执行
        console.log(error);
    });
示例 2
// 传入参数是偶数则除以 2,否则抛出错误
function fun1(param) {
    const p = new Promise((resolve, reject) => {
        const condition = param % 2 === 0; // 计算是否满足偶数条件
        if (condition) {
            const result = param / 2;
            resolve(result);
        }
        else {
            reject(`错误,参数 ${param} 不是奇数`);
        }
    })
    return p;
}

// Promise 是异步执行的,如果要用 try 捕获需要加上 await
// 这样主线程会等待 Promise 执行结束

// 不满足条件抛出错误
try {
    await fun1(5);
}
catch (error) {
    console.log(error);
}

// 满足条件输出 2
try {
    await fun1(4).then((result) => {
        console.log(result);
    });
}
catch (error) {
    console.log(error);
}

// 满足条件
// 输出 1
fun1(2)
.then((result) => {
    console.log(result);
})
.catch((error) => {
    console.log(error);
});

// 相对回调函数的优势就体现在这里
// 要是用回调函数就会大括号一层套一层,函数嵌套调用,代码一直往右延伸,称为“回调地狱”
// 用 Promise 只是往下延伸
fun1(4)
.then((result) => {
    console.log(result); // 输出 2
    return fun1(result); // 将 2 代入 Promise 再次处理
})
.then((result) => {
    console.log(result); // 打印上一个 Promise 处理的结果 1
    return fun1(result); // 将 1 代入 Promise 再次处理,1 为奇数会触发异常
})
.catch((error) => {
    console.log(error);
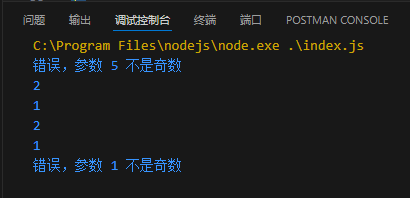
});
会话控制
当有多个用户访问服务的时候,服务器无法区分用户,需要通过特定的方法来区别,直接体现在登录账号,技术层面实现有下面方法:
cookie
Cookie 是一种在客户端存储数据的机制
一个网站通过账号区分用户,其作用原理:浏览器在向服务器发送请求的时候,如果本地存储有 cookie,就会把 cookie 一起发给服务器。初始状态,用户没有特定的 cookie 内容,在访问网站的时候,服务器可以识别出用户是未登录状态。如果用户发起登录,账号密码在服务器验证通过后,就发回一些 cookie 字段,这(些)字段是和账号是关联的,后续用户发起请求都需要携带这个 cookie,服务器就知道当前请求是哪个账号发出的。
import cookieParser from 'cookie-parser';
import express from 'express';

const app = express();

app.use(cookieParser()); // 需要安装 cookie-parser 包

// 访问页面
app.get('/', (req, res) => {
    res.send({
        msg: "Hello World!",
        cookies: req.cookies // 服务器收到的 cookie 影响给客户端
    });
});

// 设置 cookie
app.get('/set-cookie', (req, res) => {
    res.cookie(
        'example-cookie', // cookie 名
        '1234567890abcdefgh', // cookie 值
        {
            maxAge: 1000 * 60 // cookie 有效期(以毫秒为单位),不写的话,默认是关闭浏览器后失效
        }
    );
    res.send('Cookie set');
});

// 删除 cookie
app.get('/remove-cookie', (req, res) => {
    res.clearCookie('example-cookie');
    res.send('Cookie removed');
});

app.listen(3000, () => {
    console.log('Server is running on http://localhost:3000');
})
在未申请 cookie 的时候的访问,cookie 中有一个匿名 ID,可能是浏览器自动生成的
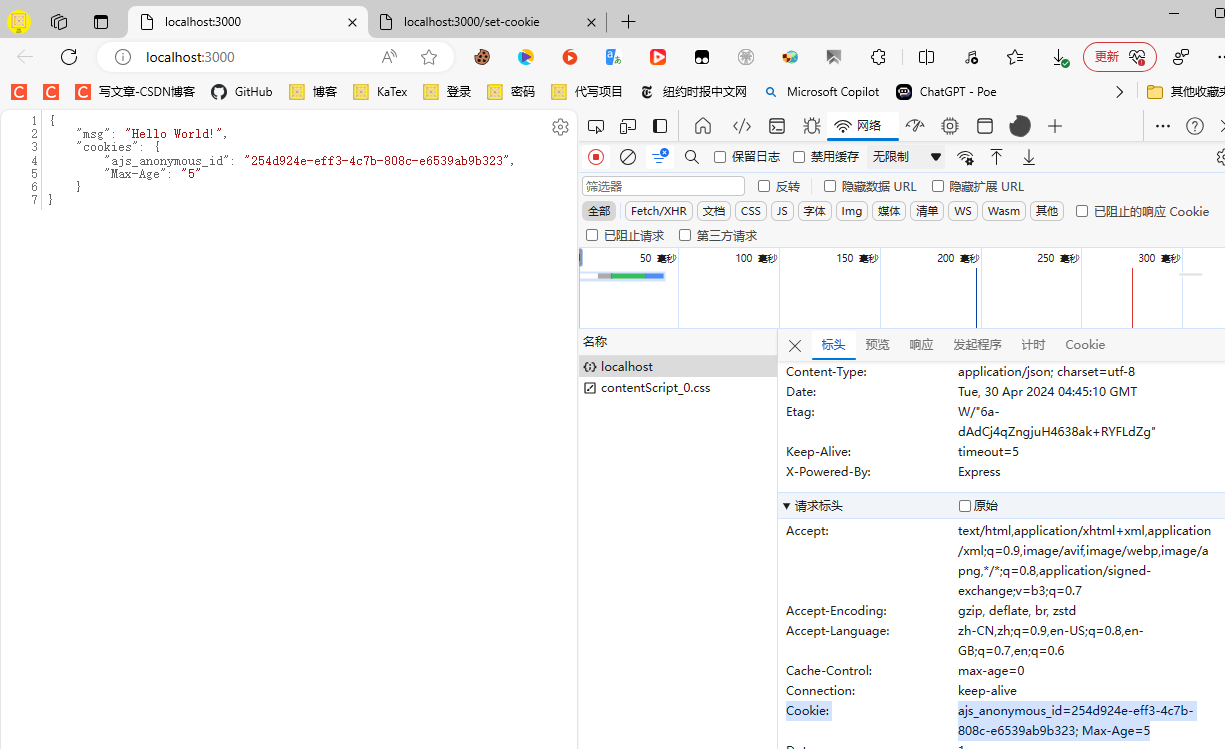
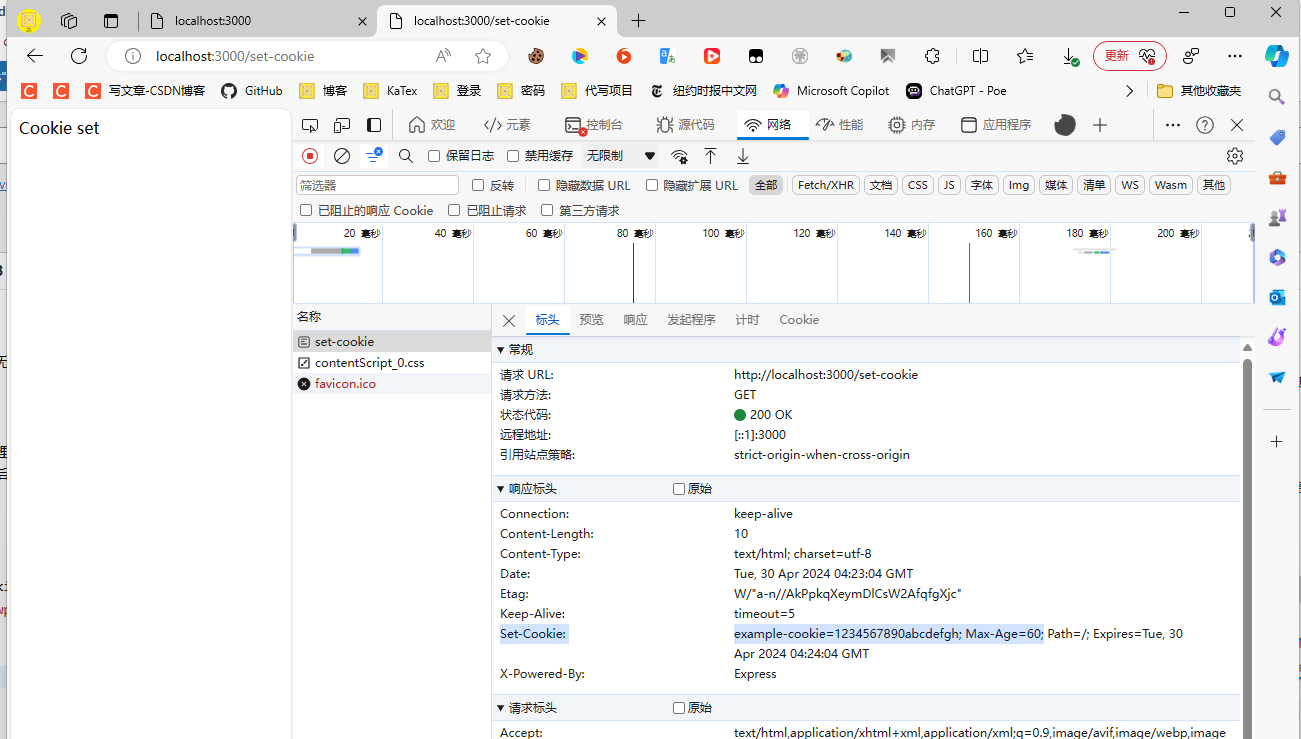
申请 cookie,可以看到响应标头中有 Set-Cookie 字段
浏览器收到这个字段就会保存 cookie,其中包含了 cookie 内容和有效时间
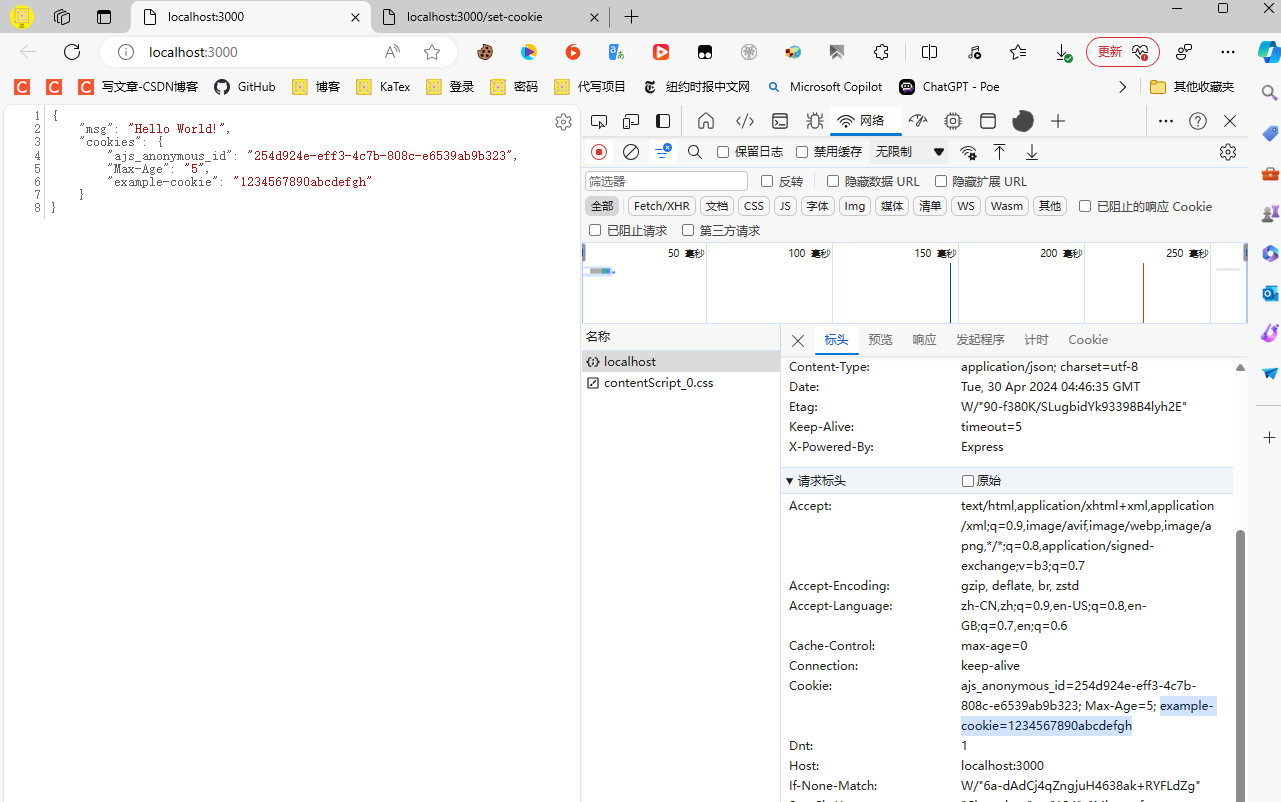
再次访问,可以看到请求标头携带上了服务器设置的 Cookie
session id
会话 ID,是会话的唯一标识。下面的例子会模拟一个登录,在访问网页的时候会携带 cookie 去请求数据。在没有登录的情况下,cookie 中没有有效的会话 ID,登录验证之后,服务器会生成会话 ID 存储在数据库中,同时在响应标头中将会话 ID 发给客户端保存到 cookie 中,后续访问时,会话 ID 伴随 cookie 一起发给服务器,服务器会检查会话 ID 是否存在于数据库中,这样就可以保持一个登录状态。
这里实践采用 MySQL 数据库来存储会话 ID。需要使用到前面用到的 mysql2 驱动和 Sequelize 实现对象到数据库的映射。另外额外需要使用 express-session 来实现会话 ID 的处理,以及使用 connect-session-sequelize 实现 express-session 和 Sequelize 的对接,以做到会话 ID 自动生成和维护。
express-session 文档:https://github.com/expressjs/session
connect-session-sequelize 文档:https://github.com/mweibel/connect-session-sequelize
import express from 'express';
import session from 'express-session';
import { Sequelize } from 'sequelize';

import SequelizeStore from 'connect-session-sequelize';
const SequelizeStoreObject = SequelizeStore(session.Store);

const app = express();

// 映射到数据库
const sequelize = new Sequelize(
    'test_db', // 数据库名
    'root', // 用户名
    '1', // 密码
    {
        host: 'localhost', // 数据库地址
        dialect: 'mysql', // 数据库类型
        timezone: '+08:00' // 时区
    });

// 测试数据库连接
try {
    await sequelize.authenticate();
    console.log('成功建立连接。');
} catch (error) {
    console.error('无法连接到数据库:', error);
}

// 创建会话 ID 存储实例
const myStore = new SequelizeStoreObject({
    db: sequelize,
});

app.use(session({
    name: 'sid', // 通过 cookie 设置会话 ID
    secret: '123456', // 用于签名的密钥,防会话篡改
    saveUninitialized: false, // 是否保存未初始化的会话,默认为 true。
    store: myStore,
    resave: false, // 是否每次请求都重新保存会话,默认为 true。
    rolling: true, // 是否在每次请求时刷新会话过期时间,默认为 false。设为 true,一直在活动就会延长有效期,而不是按照设置 cookie 的时间计算 cookie 有效期
    cookie: {
        maxAge: 1000 * 5, // 有效期(以毫秒为单位)
        httpOnly: true, // 是否只允许 HTTP 访问(禁止客户端 js 获取)

    }
}));

myStore.sync(); // 同步会话存储表(不存在表会自动创建)

// 访问页面
app.get('/', (req, res) => {
    if (req.session.isLoggedIn) {
        res.send(`欢迎回来,${req.session.user}`);
    }
    else {
        res.send('请先登录');
    }
});

// 登录
app.get('/login', (req, res) => {
    if (req.query.user === 'admin' && req.query.password === 'admin') {
        req.session.isLoggedIn = true;
        req.session.user = 'IYATT-yx';
        res.send('登录成功');
    }
    else {
        res.send('登录失败');
    }
});

// 登出
app.get('/logout', (req, res) => {
    req.session.destroy(() => { // 会删除数据库中的会话 ID
        res.send('注销成功');
    })
});

app.listen(3000, () => {
    console.log('Server is running on http://localhost:3000');
})
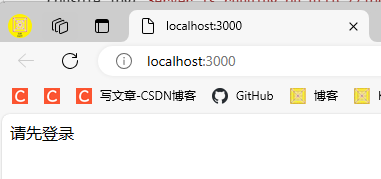
未登录状态
登录

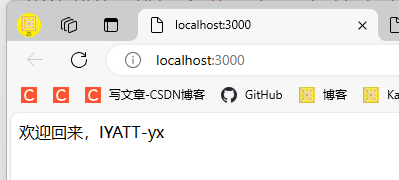
再次访问
退出登录

token
将用户信息采用一定的方式加密生成一个字符串,后续用户请求携带这个字符串,服务器可以解密字符串还原其中存储的信息(如果在有效期内)
使用 jsonwebtoken 进行实践,文档:https://github.com/auth0/node-jsonwebtoken
npm i jsonwebtoken@9.0.2这个模块是 CJS 的,这里用 ESM 方式导入得用其它方法。
简单使用
import jwt from 'jsonwebtoken';
const { sign, verify } = jwt;

// 信息
const info = {
    user: 'IYATT-yx',
    pass: '123456'
}

// 签名
const key = '123456'

const token = sign(
    info,
    key, {
        expiresIn: 60, // 过期时间
    }
)

// 生成的 token
console.log('token: ', token)

// 验证成功(没有过期,没有篡改)打印 token 中携带的信息
const result = verify(token, key, (err, data) => {
    if (err) {
        console.log('验证失败')
    } else {
        console.log('验证成功')
        console.log(data)
    }
})

