最近更新于 2024-05-05 14:19
发布于 blog.iyatt.com
前言
Python 主要优势应该是在于轮子比较多,安装也方便,依赖于丰富的第三方库,开发一个东西有时候会十分简单。C 语言的的话,主要优势在于快,代码编译成二进制数据,直接交给 CPU 执行,而不像 Python 那样由解释器执行。有时候可能也需要各自牺牲一部分优势,两者进行结合。
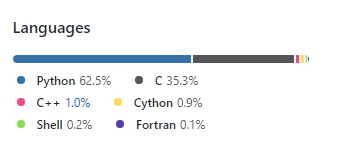
比如 Python 中常用的 NumPy 库,它的底层其实也是 C 语言。
来自于 GitHub 对 NumPy 代码组成比例统计:
Python 基于解释器执行,所以跨平台性会比较好。举个例子,一个人只会汉语,有一天他前往日本,身边就给他安排了一个既懂日语又懂汉语的人做翻译,那么他就可以通过这个翻译和其它日本人交流;某一天他又前往了美国,身边就带了一个懂英语和汉语的翻译,那么他也能通过翻译和美国人交流。Python 就相当于那个只会汉语的人,而 Python 解释器就相当于这个是翻译,在不同平台就对应在不同国家,但是有相应的解释器,也就相当于这个人在不同国家有对应语言的翻译。
C 语言的话,写的代码是要直接编译成二进制文件,不同平台二进制文件不通用,当然如果写的代码只使用了标准库的话,将代码放到不同平台下的编译器应该是可以编译出对应平台的二进制文件。但是如果使用了第三方库的话,那就不一定了,要看对应平台下有没有相应的库。在 Windows 下可执行程序扩展名为 .exe,静态库 .lib,动态库 .dll;Linux 下可执行程序没有指定扩展名,只是文件属性为可执行文件,静态库 .a,动态库 .so。
测试环境
Ubuntu 20.04 x86_64
Python 3.9.10
GNU gcc 9.4.0
Python 调用动态库
文档:https://docs.python.org/zh-cn/3/library/ctypes.html
C 库代码,命名为 module.c
主要是演示几种常用数据类型在 Python 和 C 中的对应关系
int f_int(int i)
{
    return i;
}


float f_float(float f)
{
    return f;
}


double f_double(double d)
{
    return d;
}


char f_char(char f)
{
    return f;
}


char *f_str(char *s)
{
    return s;
}

int add(int num1, int num2)
{
    return num1 + num2;
}
编译命令
gcc module.c -o libmodule.so -fPIC -shared -Wall -O3 -std=c17
Python 主程序
from ctypes import c_int, c_float, c_double, c_char, c_char_p
from ctypes import cdll
module = cdll.LoadLibrary('libmodule.so') # 导入动态库
f_int = module.f_int # 引用动态库中的函数
f_int.argtypes = [c_int] # 函数参数类型
f_int.restype = c_int # 函数返回值类型
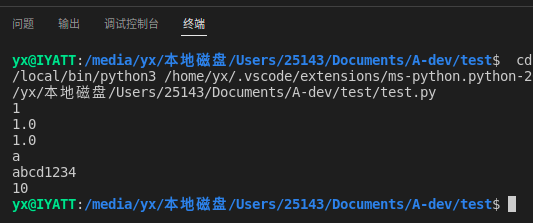
print(f_int(1))
f_float = module.f_float
f_float.argtypes = [c_float]
f_float.restype = c_float
print(f_float(1.0))
f_double = module.f_double
f_double.argtypes = [c_double]
f_double.restype = c_double
print(f_double(1.0))
f_char = module.f_char
f_char.argtypes = [c_char]
f_char.restype = c_char
print(f_char(b'a').decode('utf-8'))
f_str = module.f_str
f_str.restype = c_char_p
str = c_char_p('abcd1234'.encode('utf-8'))
print(f_str(str).decode('utf-8'))
f_add = module.add
f_add.argtypes = [c_int, c_int]
f_add.restype = c_int
num1 = 1
num2 = 9
print(f_add(num1, num2))
编写 Python 扩展
文档:https://docs.python.org/zh-cn/3.9/extending/index.html
示例就用 C 语言封装一个 system() 函数供给 Python 使用。
定义一个模块为 spam,含有一个方法为 system
① 头文件引用
这个头文件已经包含常用的 C 标准库
#define PY_SSIZE_T_CLEAN
#include "Python.h"
② 函数封装
即提供给 Python 调用的方法
获取自 Python 传入的参数,交由 C 库函数执行,并将返回值传回 Python
static PyObject *spam_system(PyObject *self, PyObject *args)
{
    const char *command;
    int sts;

    if (!PyArg_ParseTuple(args, "s", &command))  // 参数解析
    {
        return NULL;
    }
    sts = system(command);
    return PyLong_FromLong(sts);
}
③ 定义方法表
告知 Python 这个模块含有什么方法
static PyMethodDef SpamMethods[] =
{
    {"system",  spam_system, METH_VARARGS, "通过该方法可执行终端命令"},
    {NULL, NULL, 0, NULL}  // 结尾
};
④ 模块定义结构
在这个模块结构中引用前面定义的方法表
static struct PyModuleDef spammodule =
{
    PyModuleDef_HEAD_INIT,
    "spam",  // 模块名
    NULL,  // 模块文档
    -1,
    SpamMethods  // 方法表
};
⑤ 初始化模块
PyMODINIT_FUNC PyInit_spam(void)
{
    return PyModule_Create(&spammodule);
}
⑥ 测试
代码合并,命名为 spam.c
#define PY_SSIZE_T_CLEAN
#include "Python.h"


static PyObject *spam_system(PyObject *self, PyObject *args)
{
    const char *command;
    int sts;

    if (!PyArg_ParseTuple(args, "s", &command))
    {
        return NULL;
    }
    sts = system(command);
    return PyLong_FromLong(sts);
}


static PyMethodDef SpamMethods[] =
{
    {"system",  spam_system, METH_VARARGS, "通过该方法可执行终端命令"},
    {NULL, NULL, 0, NULL}  // 结尾
};


static struct PyModuleDef spammodule =
{
    PyModuleDef_HEAD_INIT,
    "spam",  // 模块名
    NULL,  // 模块文档
    -1,
    SpamMethods  // 方法表
};


PyMODINIT_FUNC PyInit_spam(void)
{
    return PyModule_Create(&spammodule);
}
同目录下创建一个文件名为 setup.py
from distutils.core import setup, Extension

module1 = Extension('spam',
                     sources=['spam.c'],
                     extra_compile_args=['-std=c17'])

setup (name='spam',
       version='0.1',
       description='spam 模块',
       author='IYATT-yx',
       author_email='iyatt@iyatt.com',
       license='AGPL-3.0',
       url='iyatt.com',
       platforms='Ubuntu 20.04 x86_64',
       ext_modules=[module1])
安装模块
python3 -m pip install .

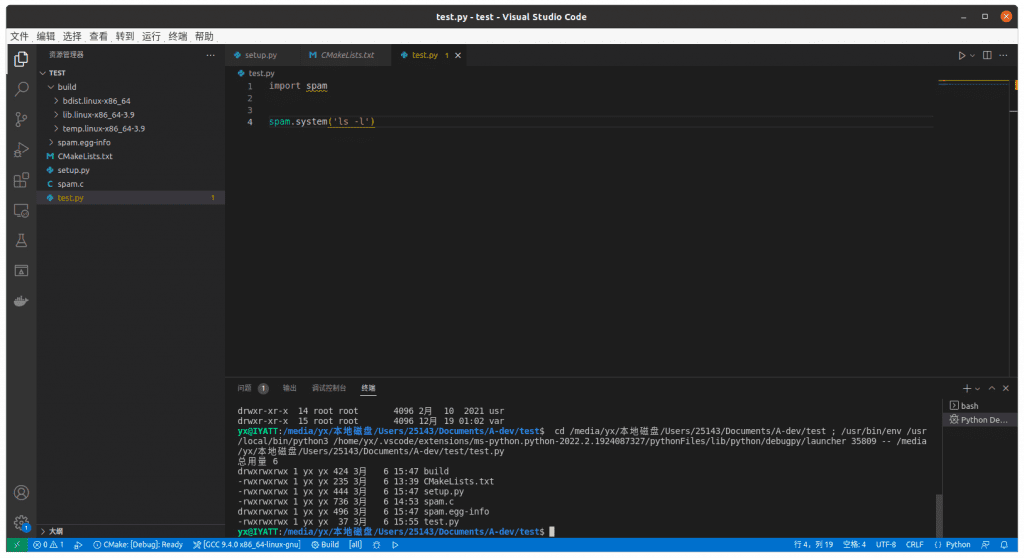
import spam


spam.system('ls -l')
⑦ 模块发布
除了上面直接安装模块的方式,还可以将模块发布出去,用户使用 pip 就能安装
python3 -m pip install [模块文件名]
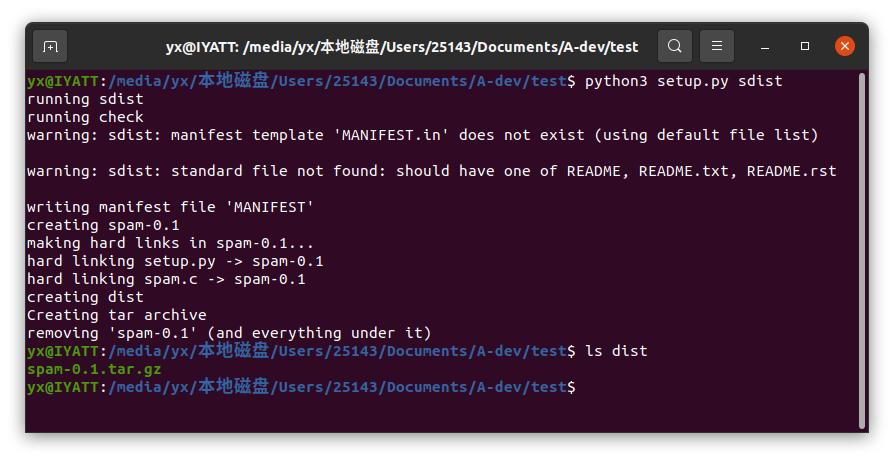
[1] 发布源码包
python3 setup.py sdist
[2] 发布二进制包
安装依赖
python3 -m pip install whell
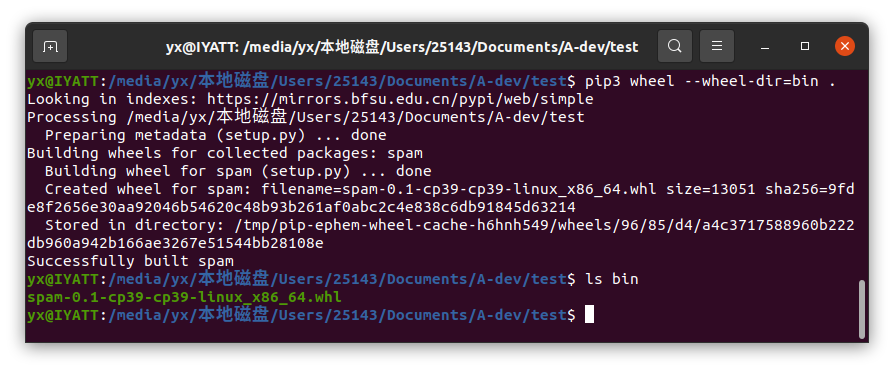
构建二进制包
pip3 wheel --wheel-dir=bin .