最近更新于 2024-05-05 14:19
简述
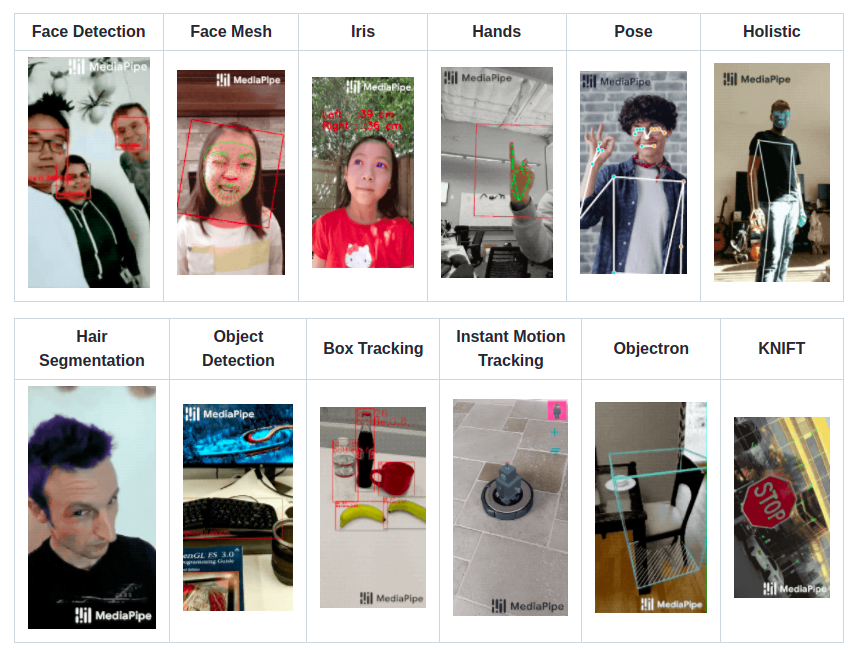
MediaPipe 是 Google 的一个开源项目,提供了多种机器学习相关的接口,可简单实现人脸检测、人像分割、手势跟踪、人体姿势估计、头发染色和人脸 3D 建模等等。
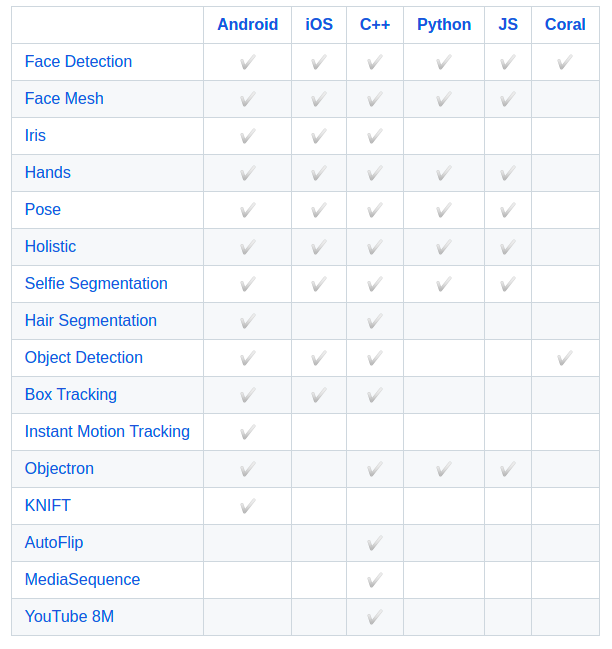
目前相关平台功能支持情况(版本号:0.8.9.1 ,2022.2.11)
官网:https://google.github.io/mediapipe/
项目地址:https://github.com/google/mediapipe
测试环境
Ubuntu 20.04 x86_64
Python 3.9.10
MediaPipe 0.8.9.1
pip3 install mediapipe==0.8.9.1
OpenCV 4.5.5
pip3 install opencv-python==4.5.5.64
附
- FPS 计算
last = 0
now = 0
def draw_fps(img, x, y, r, g, b):
    global last, now
    now = cv2.getTickCount()
    fps = int(cv2.getTickFrequency() / (now - last))
    cv2.putText(img, 'FPS: {}'.format(fps), (x,y), cv2.FONT_HERSHEY_COMPLEX, 1, (b,g,r))
    last = now
参数分别指定:图像、文字左下角坐标 (x,y)、文字颜色(r,g,b)
使用时添加到 cv2.VideoCapture().read() 所在循环内
2.图像通道顺序说明
OpenCV 中的通道顺序为 BGR
MediaPipe 中的通道顺序为 RGB
在两者交互时需要转换通道
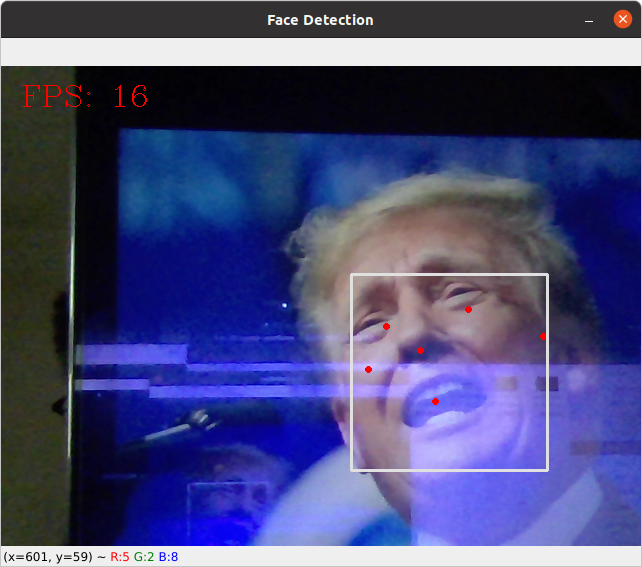
人脸检测
import cv2
import mediapipe as mp


mp_face_detection = mp.solutions.face_detection
mp_drawing = mp.solutions.drawing_utils

cap = cv2.VideoCapture(0)  # 打开摄像头
with mp_face_detection.FaceDetection(model_selection=0, min_detection_confidence=0.5)as face_detection:
    while True:
        ret, bgr_img = cap.read()  # 读取摄像头视频流
        rgb_img = cv2.cvtColor(bgr_img, cv2.COLOR_BGR2RGB)  # 转换通道顺序
        results = face_detection.process(bgr_img)  # 人脸检测
        if results.detections:
            for detection in results.detections:
                mp_drawing.draw_detection(bgr_img, detection)  # 在图像上标注检测结果
            cv2.imshow('Face Detection', bgr_img)
            if cv2.waitKey(5) == 27:
                break
cap.release()
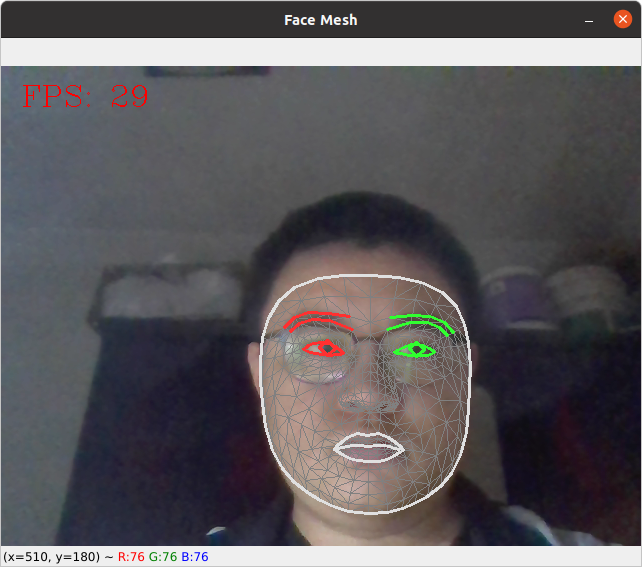
人脸 3D 建模
import cv2
import mediapipe as mp


mp_drawing = mp.solutions.drawing_utils
mp_drawing_styles = mp.solutions.drawing_styles
mp_face_mesh = mp.solutions.face_mesh

cap = cv2.VideoCapture(0)
with mp_face_mesh.FaceMesh(max_num_faces=1, refine_landmarks=True, min_detection_confidence=0.5, min_tracking_confidence=0.5) as face_mesh:
    while True:
        ret, bgr_img = cap.read()
        rgb_img = cv2.cvtColor(bgr_img, cv2.COLOR_BGR2RGB)
        results = face_mesh.process(rgb_img)  # 人脸建模
        if results.multi_face_landmarks:
            for face_landmarks in results.multi_face_landmarks:
                mp_drawing.draw_landmarks(  # 特征点网格绘制
                    image=bgr_img,
                    landmark_list=face_landmarks,
                    connections=mp_face_mesh.FACEMESH_TESSELATION,
                    landmark_drawing_spec=None,
                    connection_drawing_spec=mp_drawing_styles.get_default_face_mesh_tesselation_style())
                mp_drawing.draw_landmarks(  # 轮廓绘制
                    image=bgr_img,
                    landmark_list=face_landmarks,
                    connections=mp_face_mesh.FACEMESH_CONTOURS,
                    landmark_drawing_spec=None,
                    connection_drawing_spec=mp_drawing_styles.get_default_face_mesh_contours_style())
                mp_drawing.draw_landmarks(  # 虹膜标注
                    image=bgr_img,
                    landmark_list=face_landmarks,
                    connections=mp_face_mesh.FACEMESH_IRISES,
                    landmark_drawing_spec=None,
                    connection_drawing_spec=mp_drawing_styles.get_default_face_mesh_iris_connections_style())
        cv2.imshow('Face Mesh', bgr_img)
        if cv2.waitKey(5) == 27:
            break
cap.release()
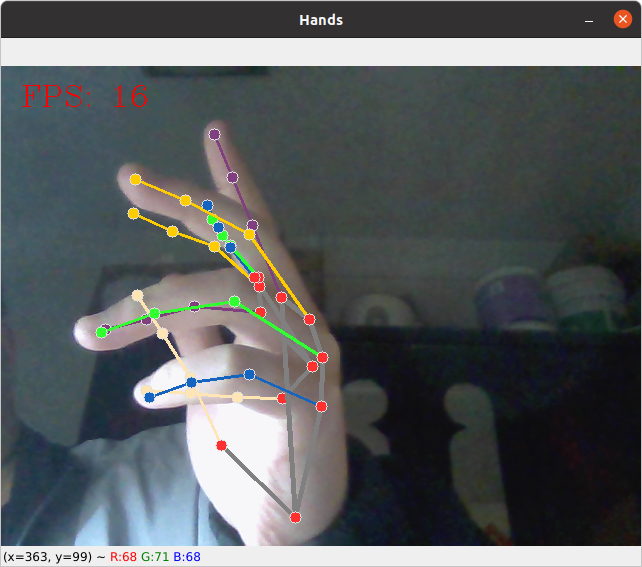
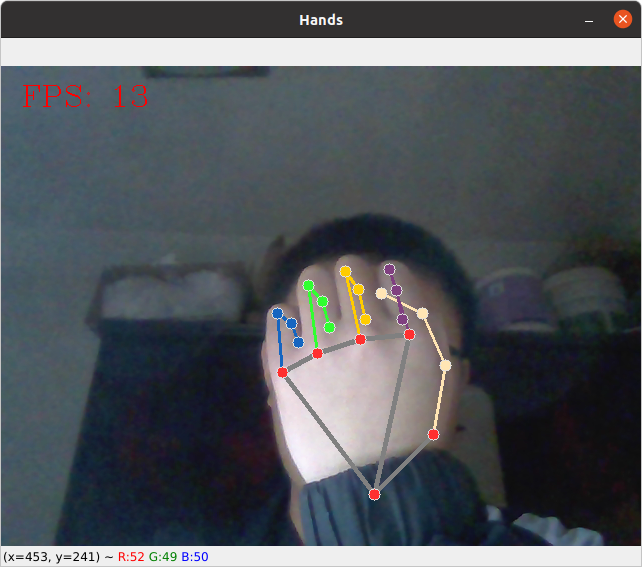
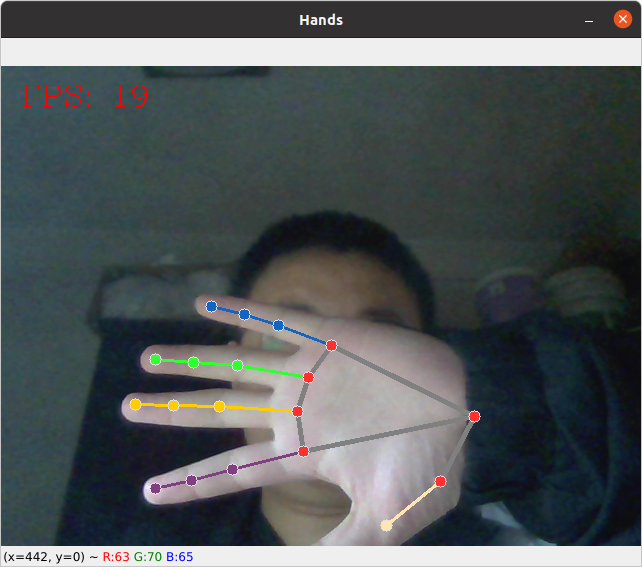
手指检测
import cv2
import mediapipe as mp


mp_drawing = mp.solutions.drawing_utils
mp_drawing_styles = mp.solutions.drawing_styles
mp_hands = mp.solutions.hands

cap = cv2.VideoCapture(0)
with mp_hands.Hands(model_complexity=0, min_detection_confidence=0.5, min_tracking_confidence=0.5) as hands:
    while True:
        ret, bgr_img = cap.read()
        rgb_img = cv2.cvtColor(bgr_img, cv2.COLOR_BGR2RGB)
        results = hands.process(rgb_img)
        if results.multi_hand_landmarks:
            for hand_landmarks in results.multi_hand_landmarks:
                mp_drawing.draw_landmarks(
                    bgr_img,
                    hand_landmarks,
                    mp_hands.HAND_CONNECTIONS,
                    mp_drawing_styles.get_default_hand_landmarks_style(),
                    mp_drawing_styles.get_default_hand_connections_style())
        cv2.imshow('Hands', bgr_img)
        if cv2.waitKey(5) == 27:
            break
cap.release()
MediaPipe 引入