最近更新于 2024-05-05 12:31
1 环境
1.1 硬件
ESP32-WROOM-32
1.2 软件
Arduino IDE 2.2.1
esp32 2.0.14(开发板)
2 探索
2.1 蓝牙扫描
2.1.1 同步扫描
同步扫描时需要设置一个扫描时间,在扫描期间会阻塞调用线程,扫描指定时间后结束。
#include <BluetoothSerial.h>

BluetoothSerial bt;

const int bt_discover_time = 10000; // 扫描时间

void setup()
{
    Serial.begin(115200);
    bt.begin("ESP32"); // 蓝牙串口设备名
    Serial.println("ESP32 启动,可以进行蓝牙连接");

    Serial.println("开始扫描......");
    BTScanResults * results = bt.discover(bt_discover_time);
    if (results)
    {
        results->dump(&Serial);
    }
    else
    {
        Serial.println("扫描出错!");
    }
}

void loop()
{
    delay(1000);
}
2.1.2 异步扫描
开始异步扫描后,在调用停止扫描之前都会保持后台扫描,适合长时间扫描,扫描期间不占用调用线程,主线程可以执行别的任务,期间一旦扫描到蓝牙设备就会调用回调函数。
#include <BluetoothSerial.h>

BluetoothSerial bt;

const int bt_discover_time = 10000; // 扫描时间

void setup()
{
    Serial.begin(115200);
    bt.begin("ESP32"); // 蓝牙串口设备名
    Serial.println("ESP32 启动,可以进行蓝牙连接");

    Serial.println("开始异步扫描......");
    if (bt.discoverAsync(bt_advertised_device_found))
    {
        Serial.println("<在这里可以同时做其它工作>");
        delay(10000);
        Serial.println("停止异步扫描......");
        bt.discoverAsyncStop();
        Serial.println("已停止");
    }
    else
    {
        Serial.println("异步扫描发生错误!");
    }
}

void loop()
{
    delay(1000);
}

void bt_advertised_device_found(BTAdvertisedDevice * device)
{
    Serial.printf("异步扫描发现一个设备:%s\n", device->toString().c_str());
}
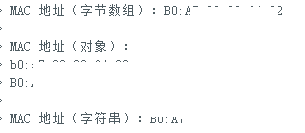
2.2 获取自身 MAC 地址
#include <BluetoothSerial.h>

BluetoothSerial bt;

void setup()
{
    Serial.begin(115200);
    bt.begin("ESP32");

    // 方式一
    byte mac_arr[6];
    bt.getBtAddress(mac_arr);
    Serial.print("MAC 地址(字节数组):");
    for (int i = 0; i < ESP_BD_ADDR_LEN - 1; ++i)
    {
        Serial.print(mac_arr[i], HEX);
        Serial.print(":");
    }
    Serial.println(mac_arr[ESP_BD_ADDR_LEN - 1], HEX);

    // 方式二
    BTAddress mac_obj = bt.getBtAddressObject();
    Serial.println("\nMAC 地址(对象):");
    Serial.println(mac_obj.toString().c_str());
    Serial.println(mac_obj.toString(true).c_str());

    // 方式三
    String mac_str = bt.getBtAddressString();
    Serial.print("\nMAC 地址(字符串):");
    Serial.println(mac_str);
}

void loop()
{
    delay(1000);
}
2.3 蓝牙简单通信示例 – 从机
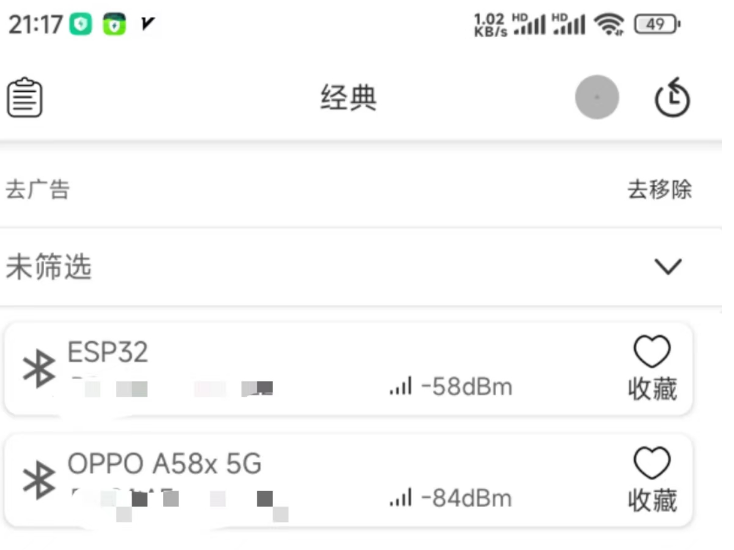
我手机使用的蓝牙调试软件(Google Play):

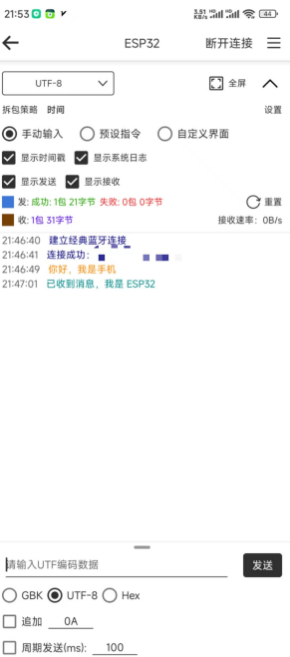
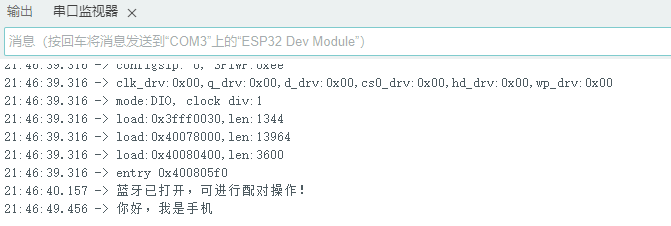
用于测试手机和 ESP32 的蓝牙通信
将蓝牙收到的数据通过串口发送到电脑,并可以从串口读取来自电脑的数据,再通过蓝牙发送
#include <BluetoothSerial.h>

BluetoothSerial bt;

void setup()
{
    const char * device_name = "ESP32";

    Serial.begin(115200);
    bt.begin(device_name);

    Serial.println("蓝牙已打开,可进行连接!");
}

void loop()
{
    while (Serial.available())
    {
        bt.write(Serial.read());
    }

    while (bt.available())
    {
        Serial.write(bt.read());
    }

    delay(20);
}
2.4 SSP 配对 – 从机
Secure Simple Pairing(SSP),安全简单配对
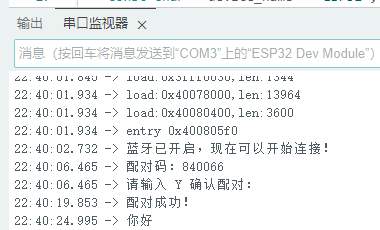
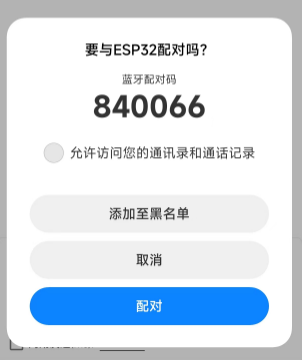
这里主要是体现配对的安全验证,已经配对过可以在手机设置取消配对。在配对的时候会提示配对码,可以检查和要连接的对象是否对应,并且 ESP32 这边需要进行确认才能配对成功。
#include <BluetoothSerial.h>

BluetoothSerial bt;
boolean confirm_request_pending = true;

void bt_confirm_request_callback(uint32_t num_val)
{
    confirm_request_pending = true;
    Serial.printf("配对码:%d\n请输入 Y 确认配对:", num_val);
}

void bt_auth_complete_callback(boolean success)
{
    confirm_request_pending = false;
    if (success)
    {
        Serial.println("\n配对成功!");
    }
    else
    {
        Serial.println("\n用户拒绝,配对失败!");
    }
}

void setup()
{
    const char * device_name = "ESP32";

    Serial.begin(115200);

    bt.enableSSP();
    bt.onConfirmRequest(bt_confirm_request_callback); // 配对确认
    bt.onAuthComplete(bt_auth_complete_callback); // 验证结果
    bt.begin(device_name);

    Serial.println("蓝牙已开启,现在可以开始连接!");
}

void loop()
{
    if (confirm_request_pending && !bt.connected())
    {
        if (Serial.available())
        {
            int ch = Serial.read();
            if ('Y' == ch || 'y' == ch)
            {
                bt.confirmReply(true);
            }
            else
            {
                bt.confirmReply(false);
            }
        }
    }
    else
    {
        while (Serial.available())
        {
            bt.write(Serial.read());
        }

        while (bt.available())
        {
            Serial.write(bt.read());
        }
    }
}
2.5
ESP32 蓝牙开发(编辑中)
